Standard Functionalities
The following are standard functionalities for both airline and developer users.
For functionalities specific to airline users, refer to the Airline User Guide.
For functionalities specific to developer users, refer to the Developer User Guide.
Themes
For more information on themes, refer to Getting Started: Themes.
Access themes by selecting Themes in the left navigation menu.
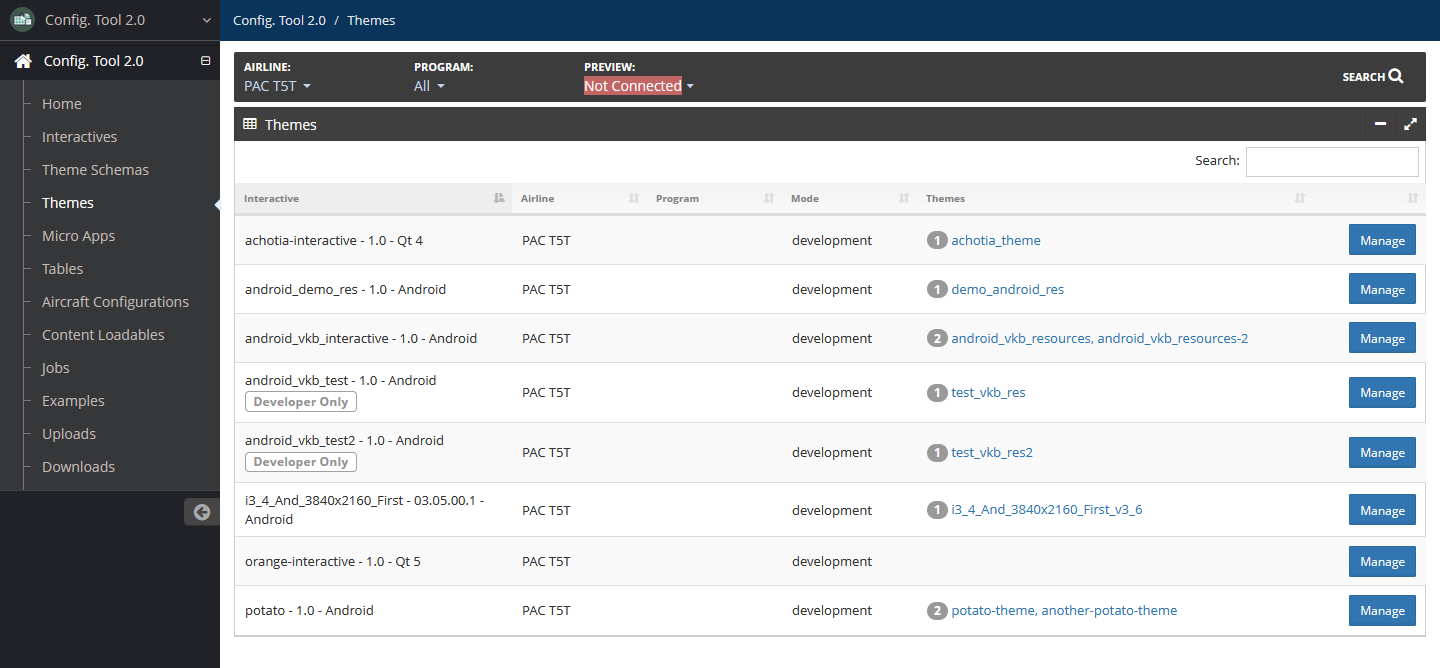
Add Theme
To manually add a theme:
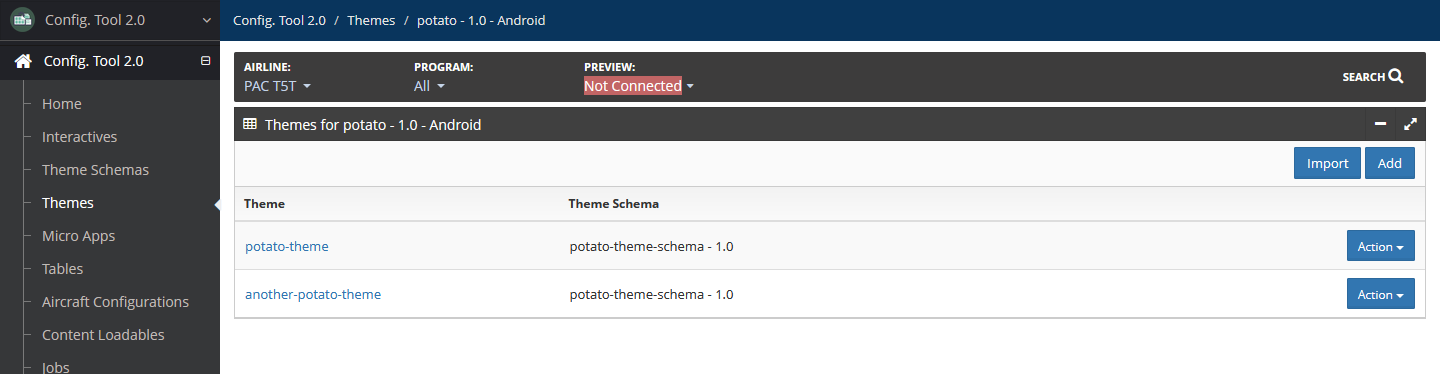
On the Themes page, locate the interactive to associate with the theme, then select Manage.
Select Add.
Add the following details:
Name — Required
Name of the theme.
Theme Schema — Required
Theme schema to associate the theme.
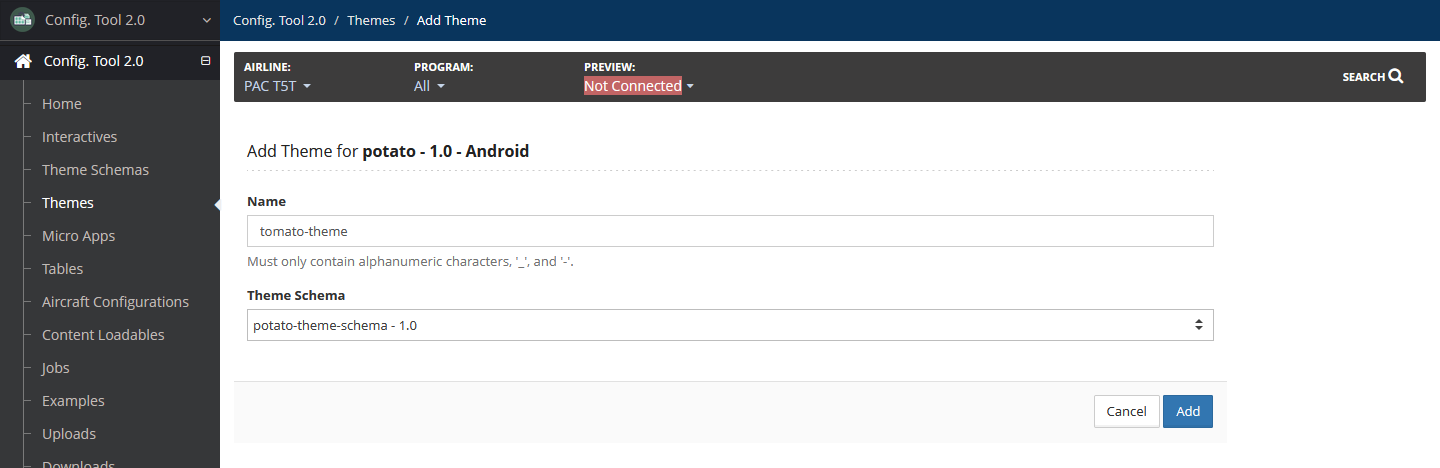
Select Add.
Import Theme
The theme to be imported must be in a TGZ format file. Both Android and non-Android themes can be imported using this method.
To import a theme to an interactive:
On the Themes page, locate the interactive to associate with the theme to be imported, then select Manage.
Select Import.
Add the following details:
Theme File — Required
Select Upload to browse to and select the theme TGZ file from your system.
New Theme Name — Required
Name of the theme.
Theme Schema — Required
Theme schema to associate the theme.
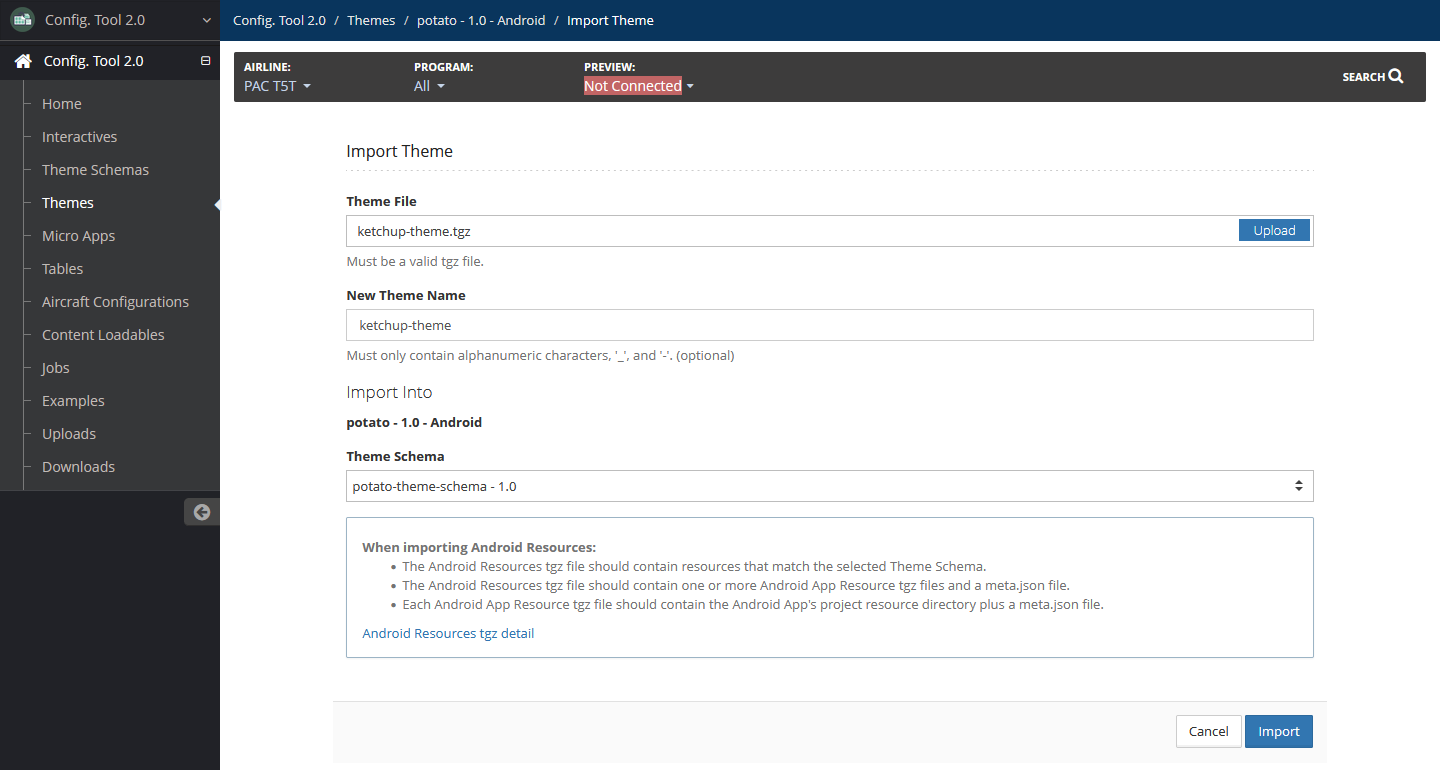
Select Import.
Import Theme Properties
Importing theme properties requires an existing theme and a spreadsheet file.
To import theme properties:
On the Themes page, select the theme where you want to import properties.
Select Import, then select From Spreadsheet.
Select Upload to browse to and select the spreadsheet file from your system.
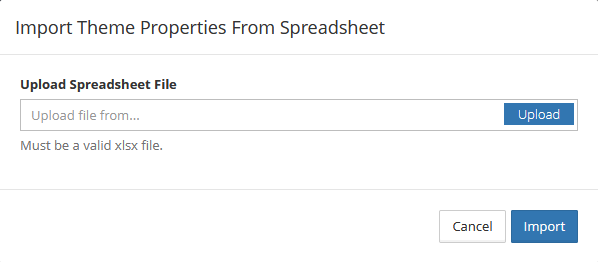
Select Import.
Duplicate Theme
To duplicate a theme:
On the Themes page, locate the interactive associated with the theme, then select Manage.
Locate the theme to duplicate. Select Action, then select Duplicate.
In the New Theme Name field, enter the new theme name.
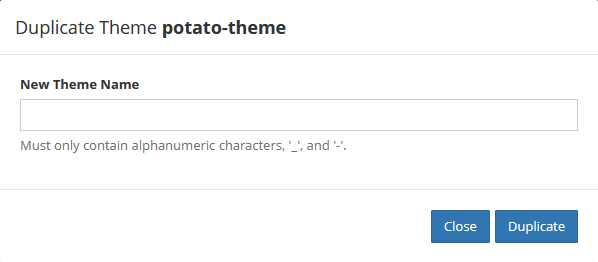
Select Duplicate.
Rename Theme
To rename a theme:
On the Themes page, locate the interactive associated with the theme, then select Manage.
Locate the theme to duplicate. Select Action, then select Rename.
In the Name field, enter the new theme name.
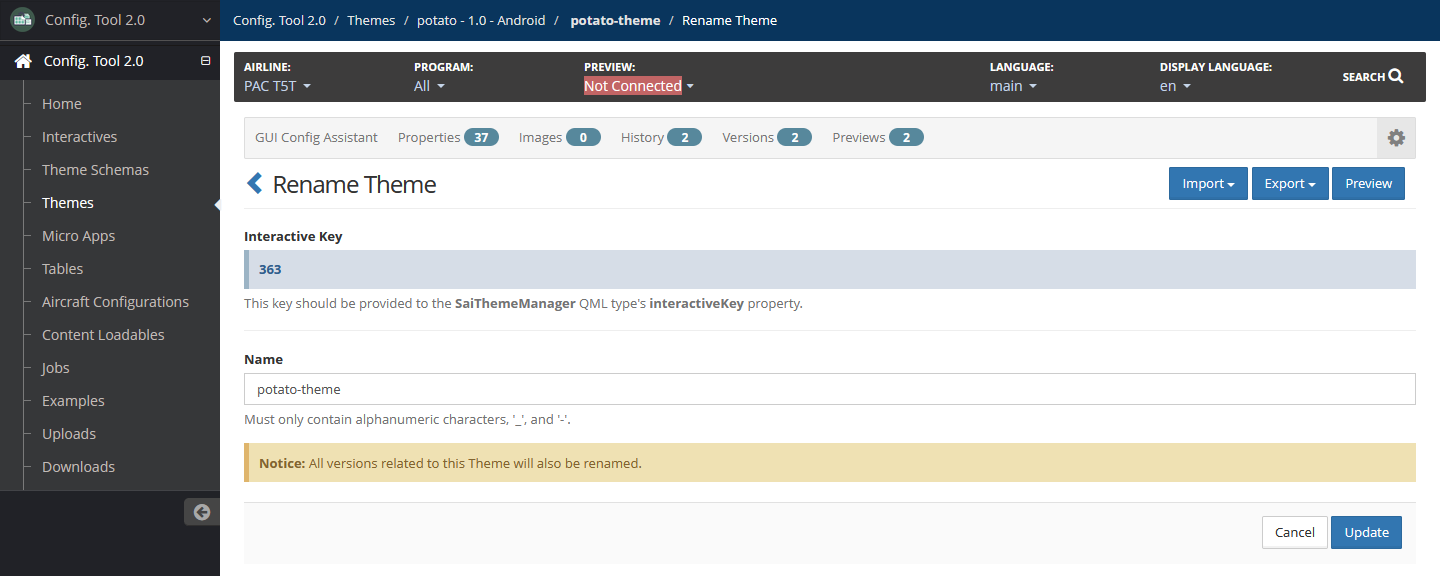
Select Update.
Move Theme to Different Interactive
Use this option to assign a theme to a different interactive.
This option is available if the new interactive also uses the same theme schema. If the new interactive does not use the same schema, the Move Theme to Another Interactive page displays a message indicating that there are no available interactives to move the theme.
To move a theme to another interactive:
On the Themes page, locate the interactive associated with the theme, then select Manage.
Locate the theme to move. Select Action, then select Change Interactive.
Select the interactive to which you want to move the theme.
Only interactives that use the same theme schema are available.
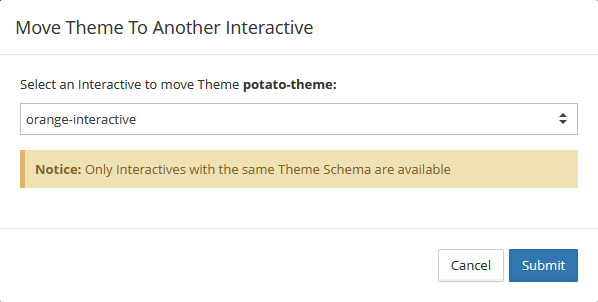
Select Submit.
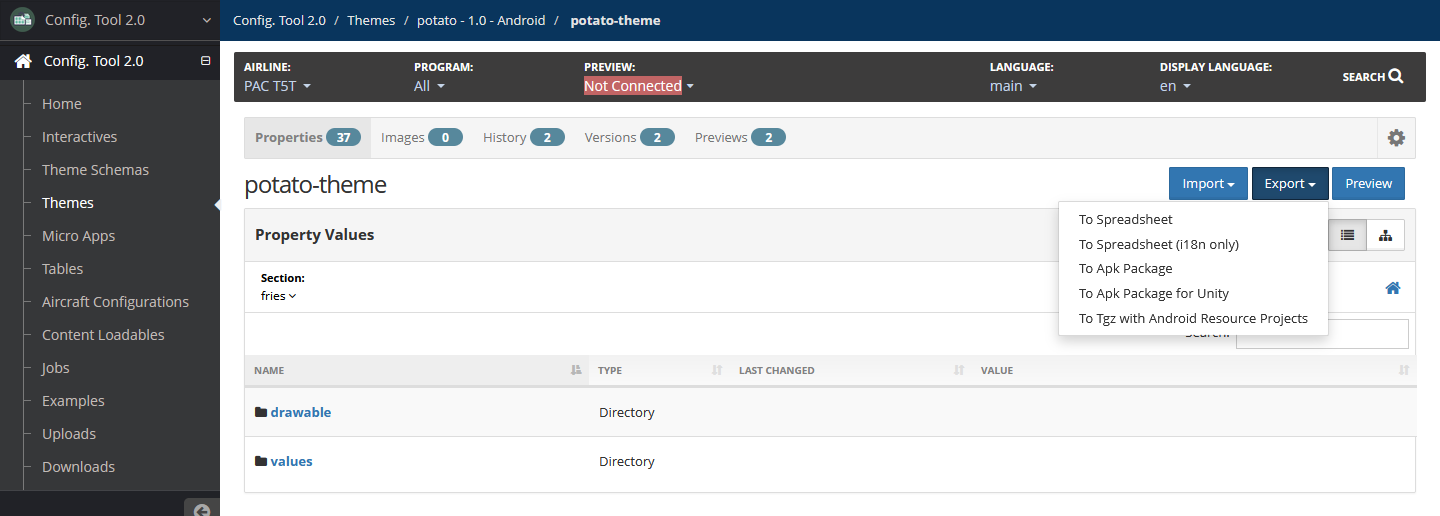
Export Theme
Themes can be exported to the following:
| Format | Android Themes | Qt Themes | Property Types | Airline Users | Developer Users |
|---|---|---|---|---|---|
| Spreadsheet | ✓ | ✓ | All | ✓ | ✓ |
| Spreadsheet (i18n only) | ✓ | ✓ | i18n only | ✓ | ✓ |
| APK Package | ✓ | All | ✓ | ✓ | |
| APK Package for Unity | ✓ | All | ✓ | ✓ | |
| TGZ | ✓ | All | ✓ | ✓ | |
| TGZ with Android Resource Projects | ✓ | All | ✓ |
Spreadsheet exports can be modified and reimported to update theme properties. For additional information on importing, refer to Import Theme Properties.
To export a theme:
On the Themes page, select the theme to export.
If the theme you want to export is not listed, locate the interactive associated with the theme, select Manage, then select the theme.
Select Export, then select one of the export options.
APK package exports create background jobs. View and download the export in Jobs.
View Theme History
To view historical activity for a theme:
On the Themes page, select the theme whose history you want to view.
Select the History tab. A list of theme activity displays.

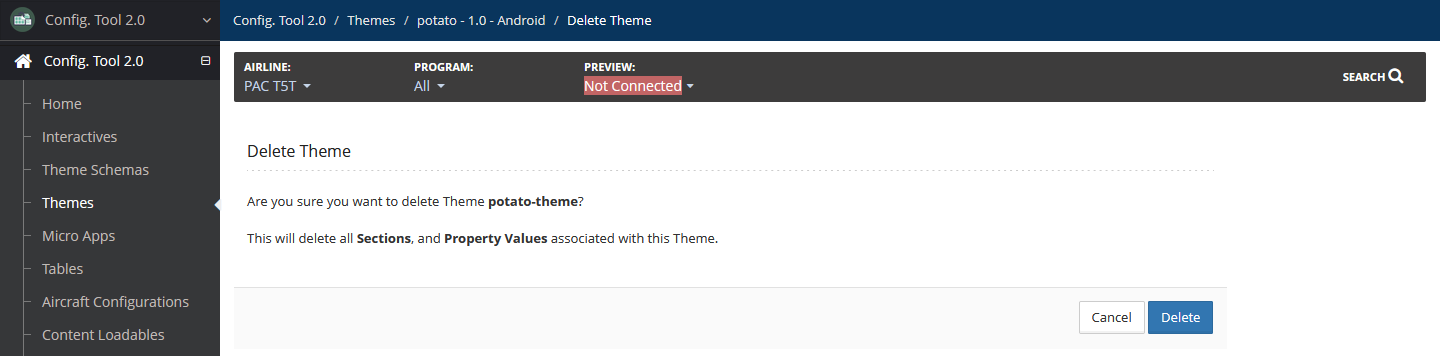
Delete Theme
Deleting a theme also removes theme sections and theme property values.
To delete a theme:
On the Themes page, locate the interactive associated with the theme, then select Manage.
Locate the theme to delete. Select Action, then select Delete.
Confirm the deletion by selecting Delete.
Theme Properties
Edit Theme Property
To edit a theme property:
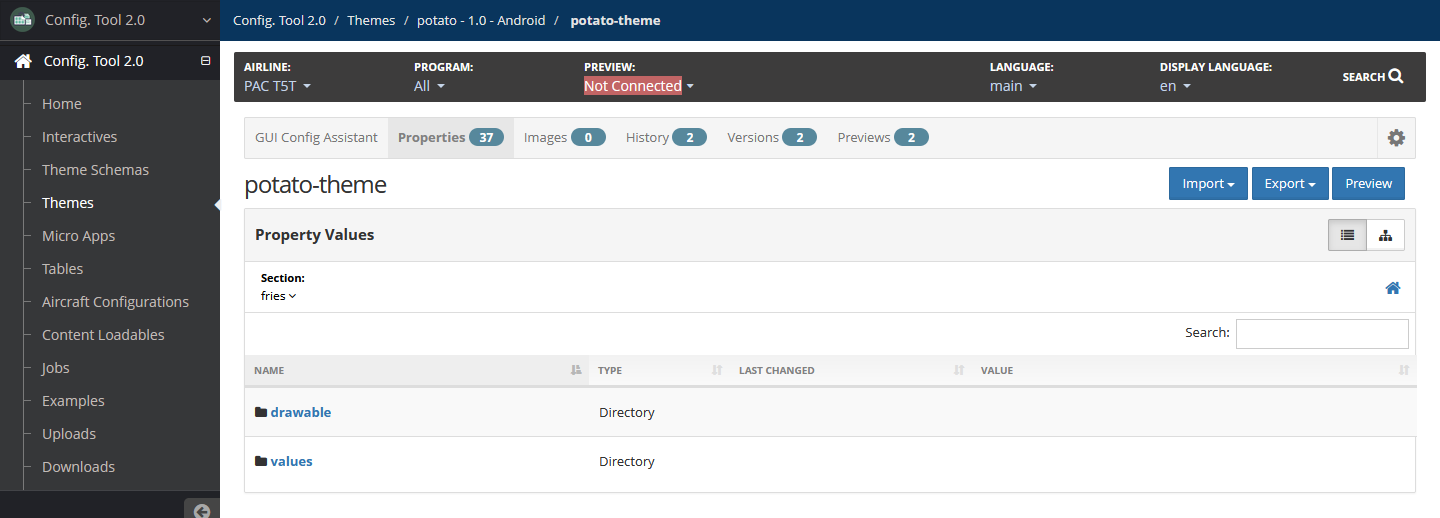
In the theme that contains the property to edit, select the Properties tab.
Select the theme section from the Section dropdown. This displays directories and properties in the theme.
Locate the property you want to edit, then select Edit.
Update the property value as needed.
For additional information on each value type, refer to Theme Property Types.
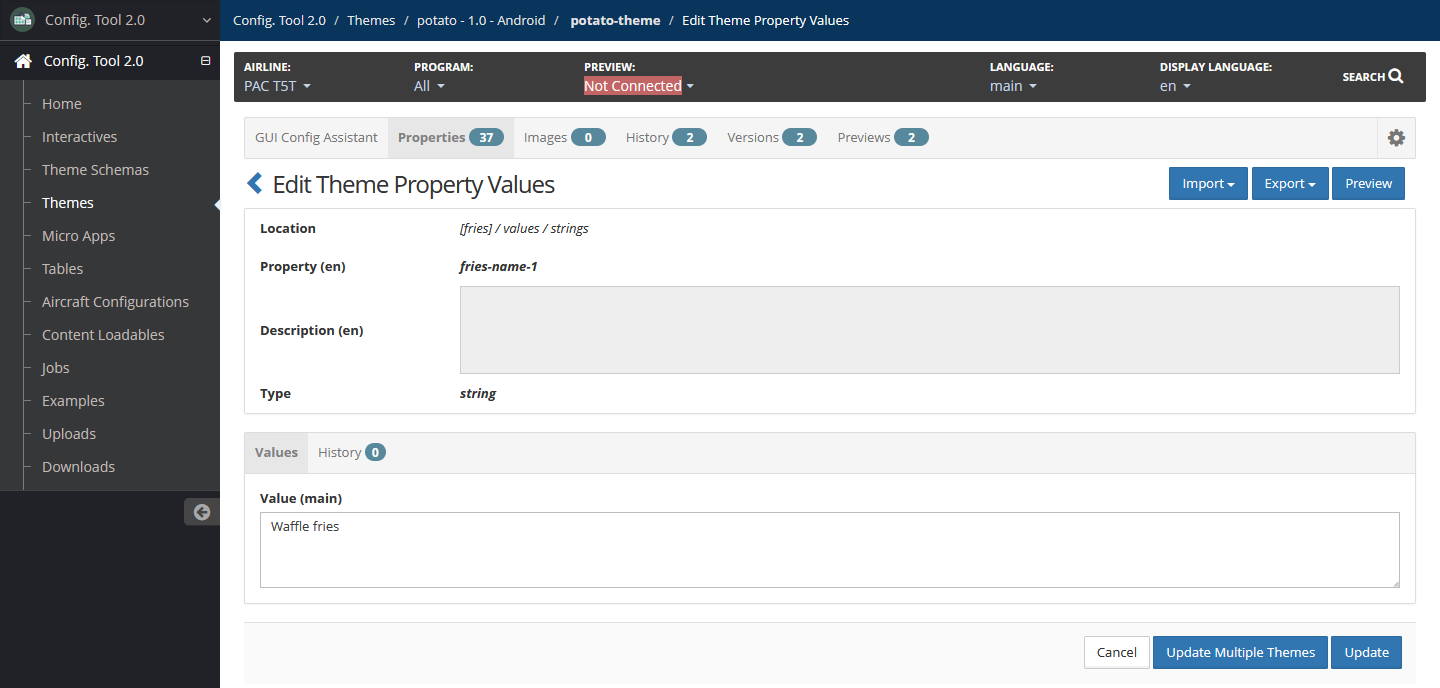
Select one of the following options:
Update — Select this to update the property only in the current theme.
Update Multiple Themes — Select this to update the property in one or multiple themes that uses it.
Select themes where you want the property to also be updated.
Select Submit.
Theme Property Types
| Type | Description |
|---|---|
| Boolean | A boolean value can be either true or false. Select the checkbox for true. Leave unselected for false. |
| Color | You can select a color using the interactive color selector or manually enter the hexadecimal value of a color with optional alpha values. |
| Enum | An enum, or enumeration, offers a choice of several options. To set the enum, you can select an option from the dropdown. |
| Float | A float is a number that can be a decimal point value, such as 4.10 or 9. |
| Image | You can import PNG or JPG images. For more information on adding and managing images, refer to Images. |
| Integer | An integer is a whole number without a decimal point, such as 32. |
| String | A string is any text. If your themes are internationalized, an easy method to incorporate translated text is to export the theme to a spreadsheet, have your translator update the language in the spreadsheet, then reimporting the spreadsheet. For information on importing a spreadsheet, refer to Import Theme Properties. |
Images
Add Image
To add images:
In your working theme, select the Images tab.
Select Add.
You can add an individual image file or a zip file containing multiple images. Select Browse under Image File, then browse to and select the image or zip file from your system.
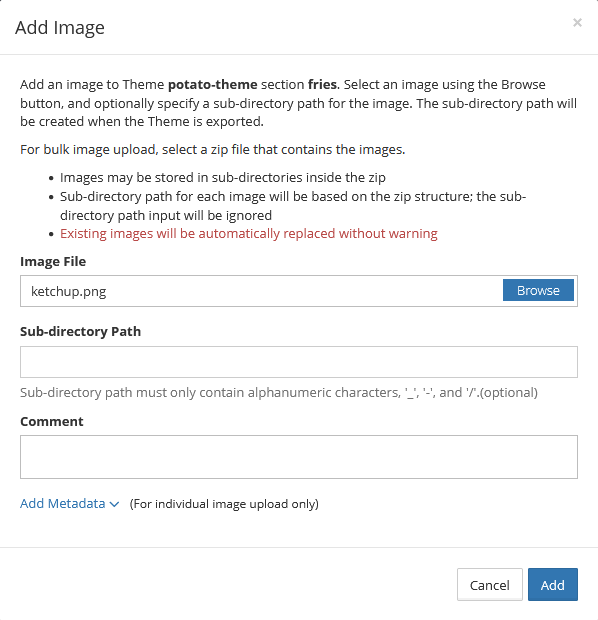
Add a sub-directory path and comment if needed.
For individual image uploads, you can add metadata.
Select Add Metadata
Add the following details:
Date — Use the date picker to select a date or manually enter a valid date in YYYY-MM-DD format.
Info — Use this field to add general information about the image or images.
Tags — Add a comma-separated list of strings. This can be used to filter images when searching.
Select Add.
Delete Image
You can delete one or multiple images at a time.
To delete images:
In your working theme, select the Images tab.
Select one or more images you want to delete, then select Remove.
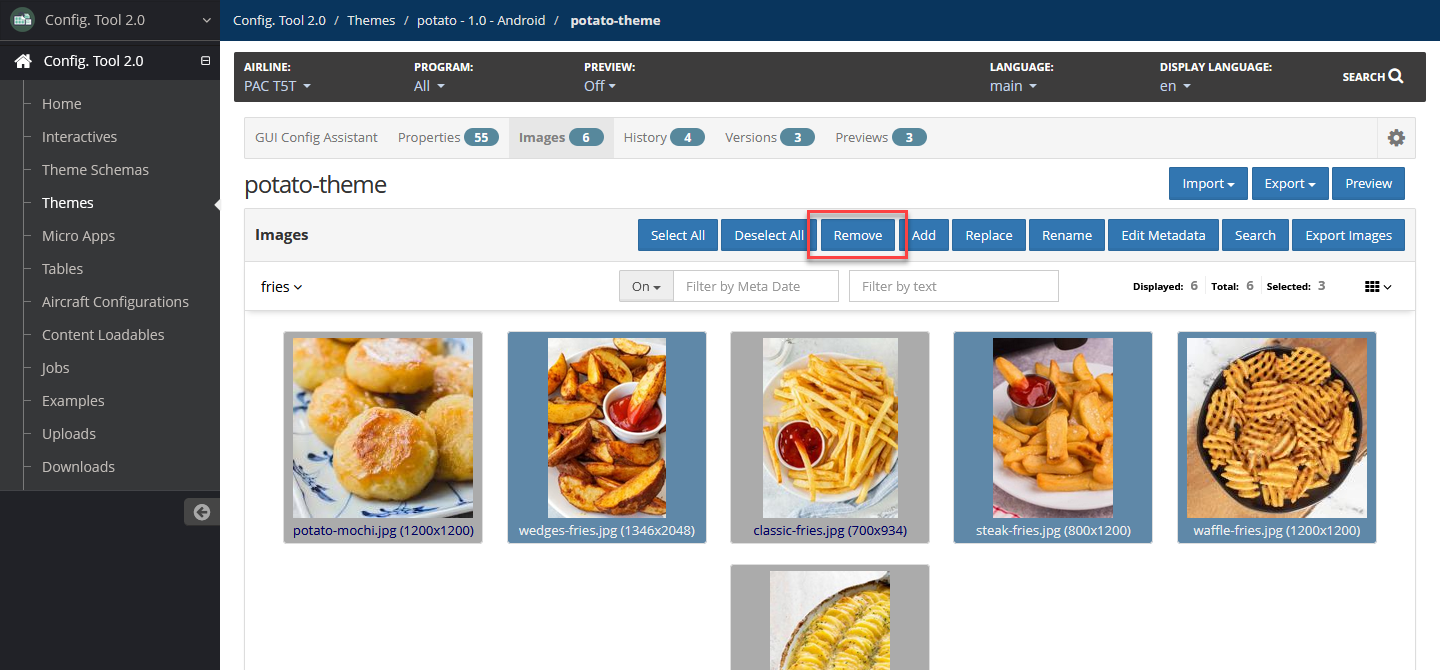
A confirmation message displays. Select Remove.
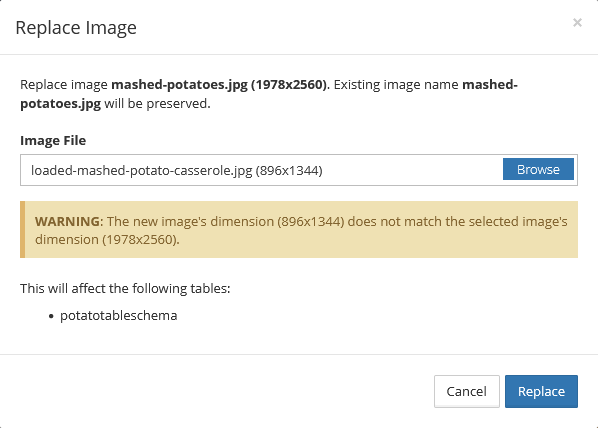
Replace Image
To replace an image:
In your working theme, select the Images tab.
Select the image you want to replace, then select Replace.
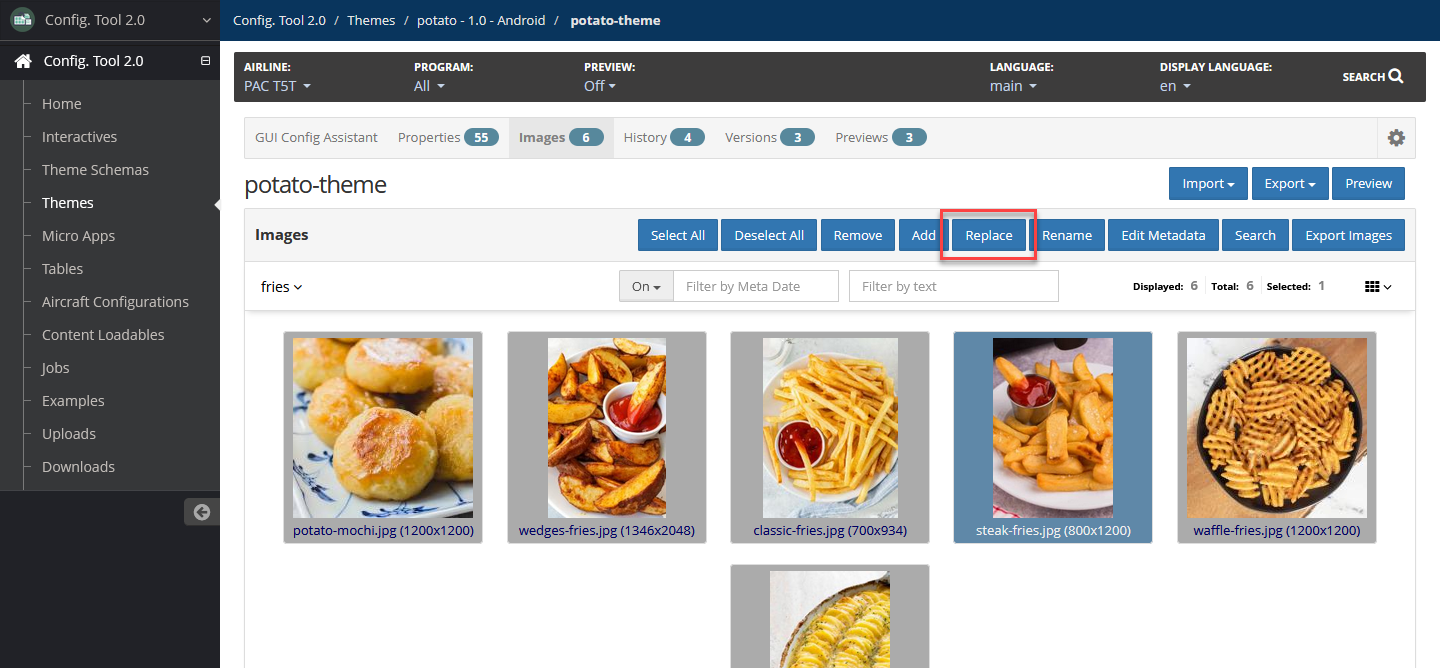
In the Image File field, browse to and select a new image file from your system.

Add a comment in the Comment field if needed.
Select Replace.
Rename Image
To rename an image:
In your working theme, select the Images tab.
Select the image you want to rename, then select Rename.
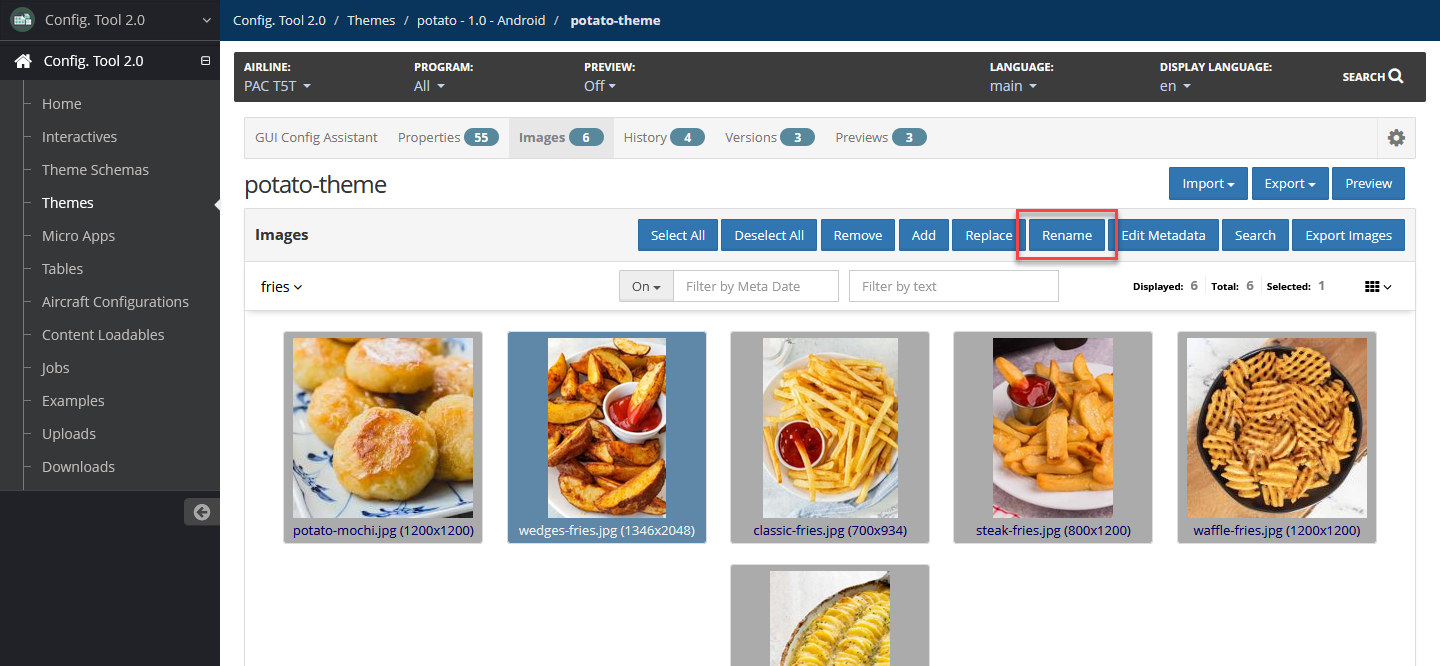
Enter the new name in the Name field.
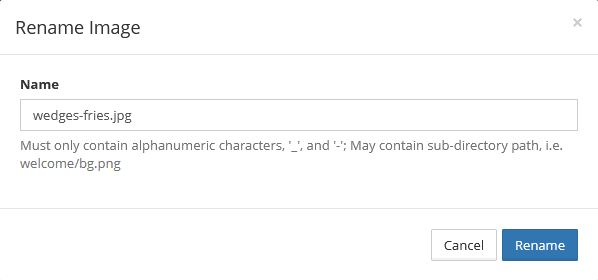
Select Rename.
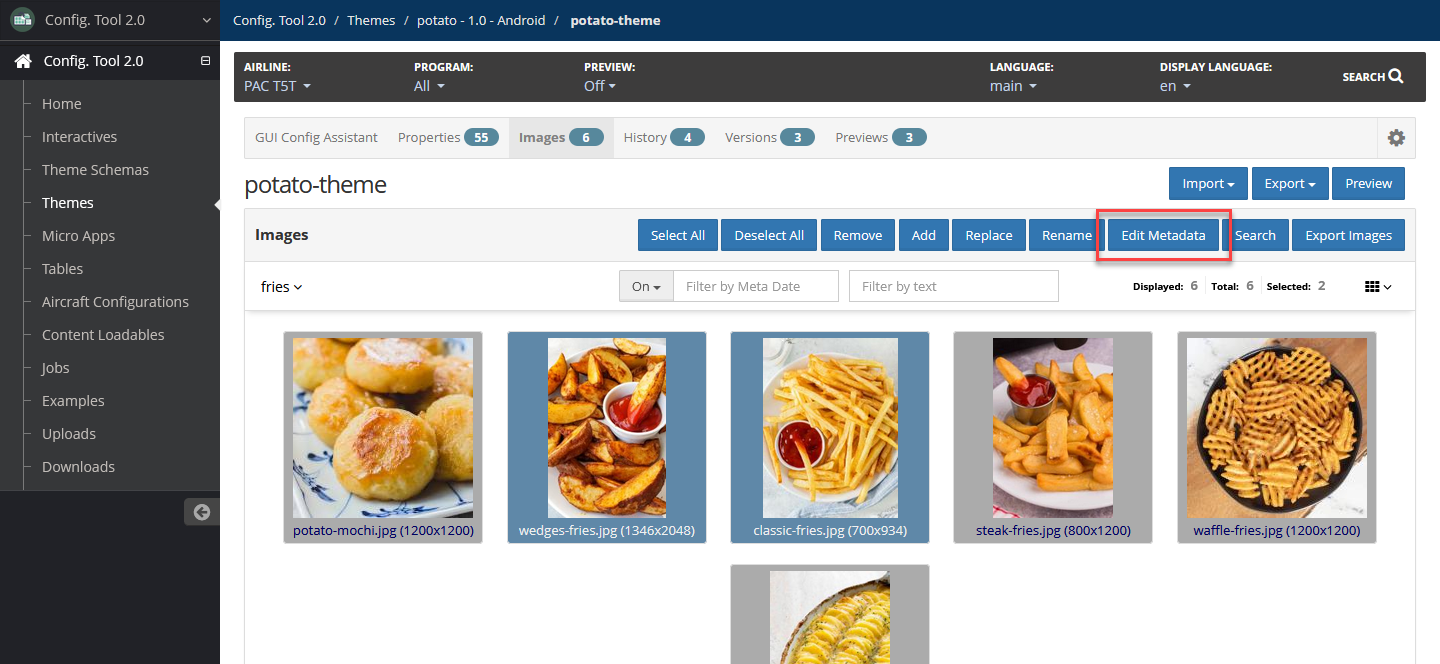
Edit Image Metadata
Metadata of an image is optional. You can edit the metadata of one or multiple images at a time.
To edit the metadata of one or more images:
In your working theme, select the Images tab.
Select one or more images, then select Edit Metadata.
Add, update or delete the following:
Date — Use the date picker to select a date or manually enter a valid date in YYYY-MM-DD format.
Info — Use this field to add general information about the image or images.
Tags — Add a comma-separated list of strings. This can be used to filter images when searching.
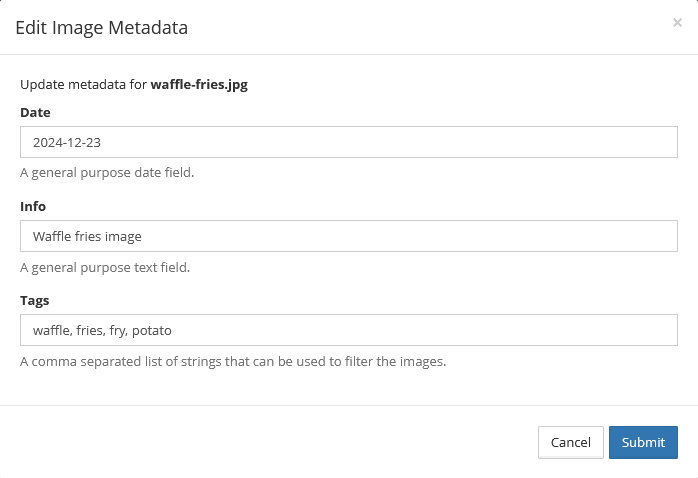
Select Submit.
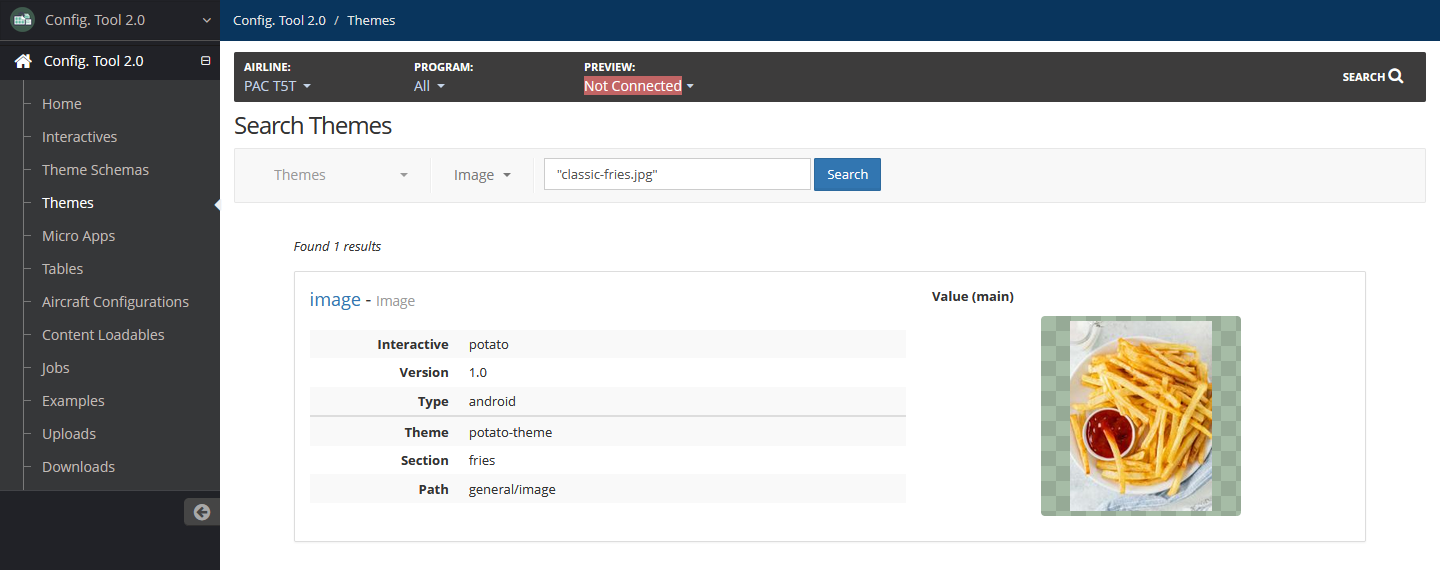
Search for Image
You can search for one or multiple images.
To search for interactives and themes that use specific images:
In your working theme, select the Images tab.
Select images, then select Search.
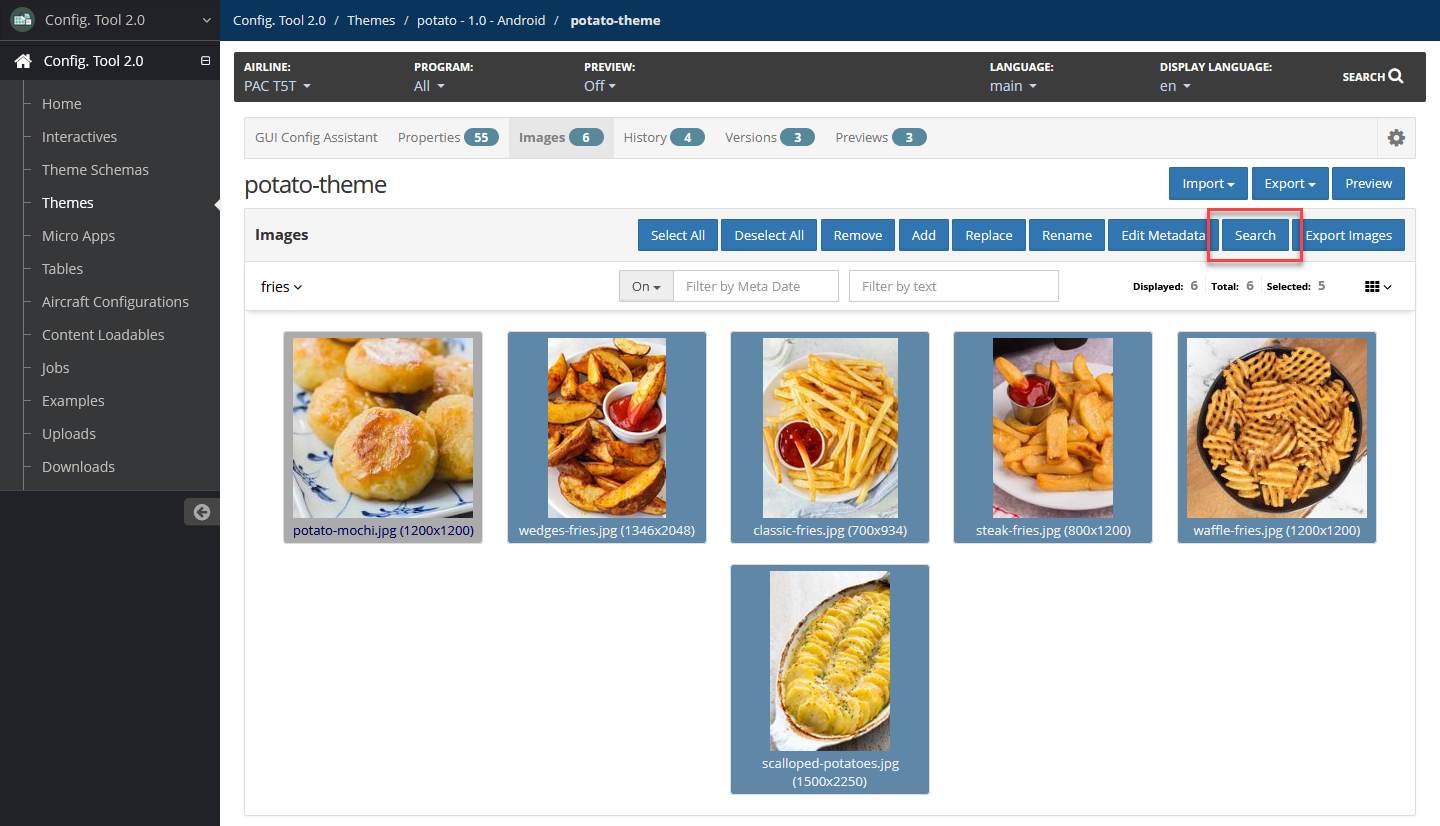
In a new tab, the Search page displays locations and details on the images are used.
Export Images
You can export one or multiple images at a time.
To export images:
In your working theme, select the Images tab.
Select one or more images, then select Export Images.
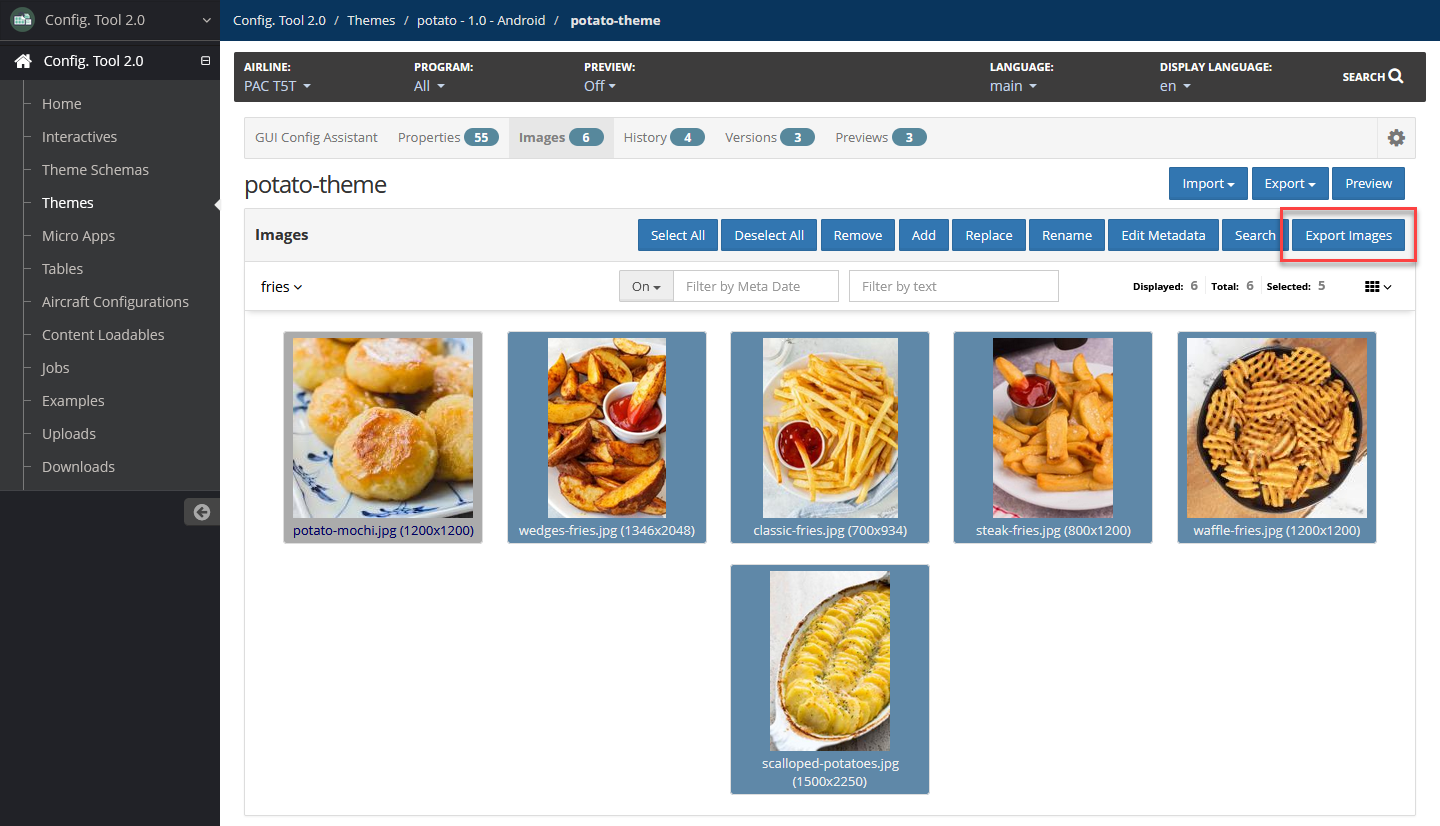
The selected images are exported.
GUI Config Assistant
The GUI Config Assistant helps you maintain images or screens that have associated properties. The assistant can do the following:
Display an image.
Link to properties associated with an image.
Shows where properties display on a page.
To update UI page properties using the GUI Config Assistant:
In your working theme, select the GUI Config Assistant tab.
Select a screenshot containing the property to update.
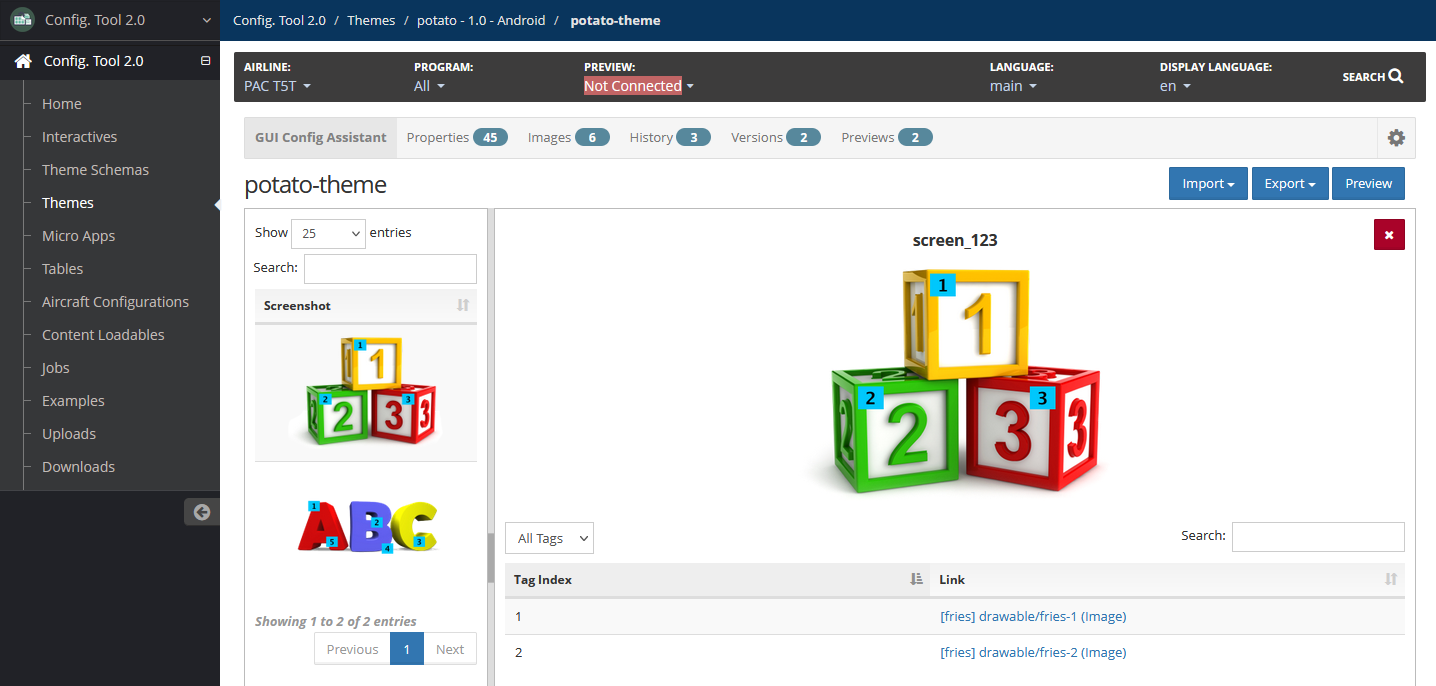
Locate the property using the image tag number, then select the linked property in the list. In a new tab, this displays the Edit Theme Property Values page for the selected property.
Update the property values as needed.
For additional information on each value type, refer to Theme Property Types.
Select one of the following:
Update — Select this to update the property only in the current theme.
Update Multiple Themes — Select this to update the property in one or more themes that uses it.
Select themes where you want the property to also be updated.
Select Submit.
Versions
Create Theme Version
To create a theme version:
In your working theme, select the Versions tab.
Select Create Version.
Add the following details:
Version — Required
Unique version number using only alphanumeric characters, underscores and hyphens.
Description — Optional
Description about the new theme version.
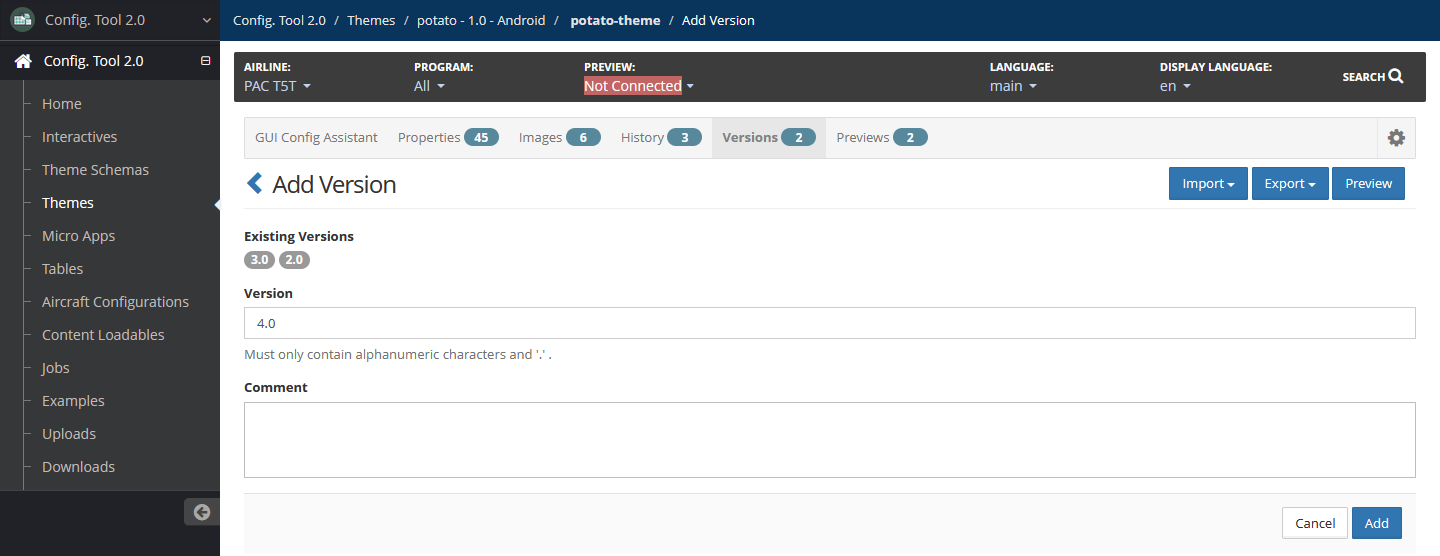
Select Add.
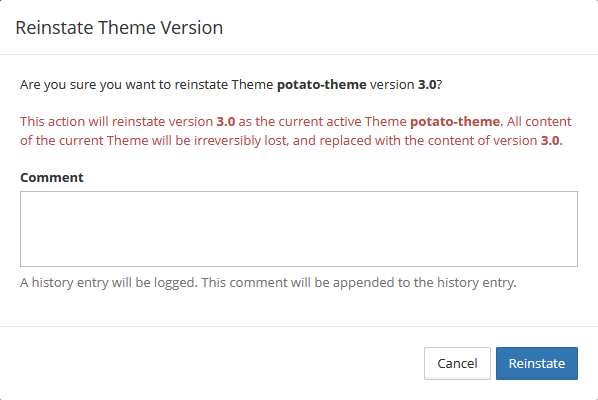
Reinstate Theme Version
Reinstating a version overwrites all current active content of a theme.
To reinstate a theme version:
In your working theme, select the Versions tab.
Locate the version to reinstate. Select Actions, then select Reinstate.
Add a comment if necessary, then select Reinstate.
Export Theme Version
To export a theme version to an APK package:
In your working theme, select the Versions tab.
Locate the version to export. Select Actions, then select Export to Apk Package or Export to Apk Package for Unity.
The theme version is exported.
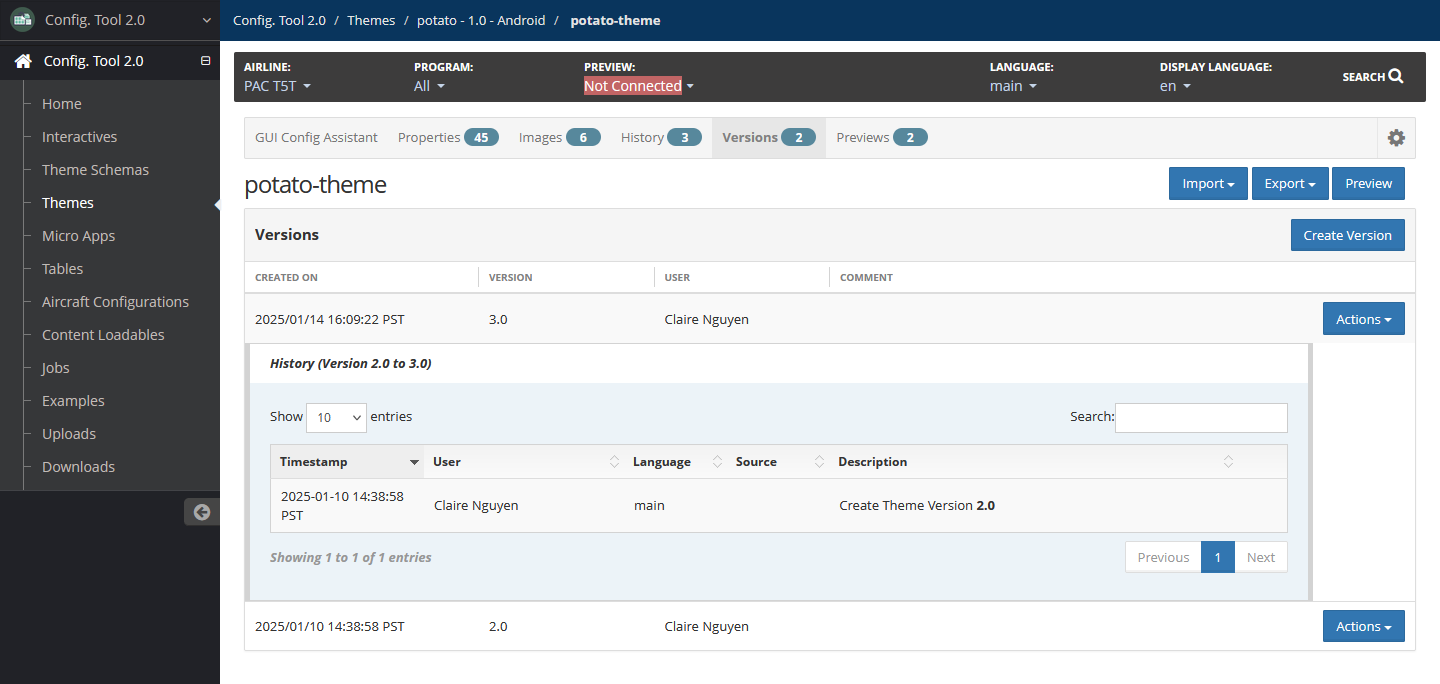
View Theme Version History
A theme version history displays a catalog of changes between the selected version and the previous version, such as changes to properties and version creations.
To view a theme version's history:
In your working theme, select the Versions tab.
Locate the version. Select Actions, then select Show history. A history panel displays a list of changes between the selected version and the previous version.
To close the history panel, select Actions, then select Hide History.
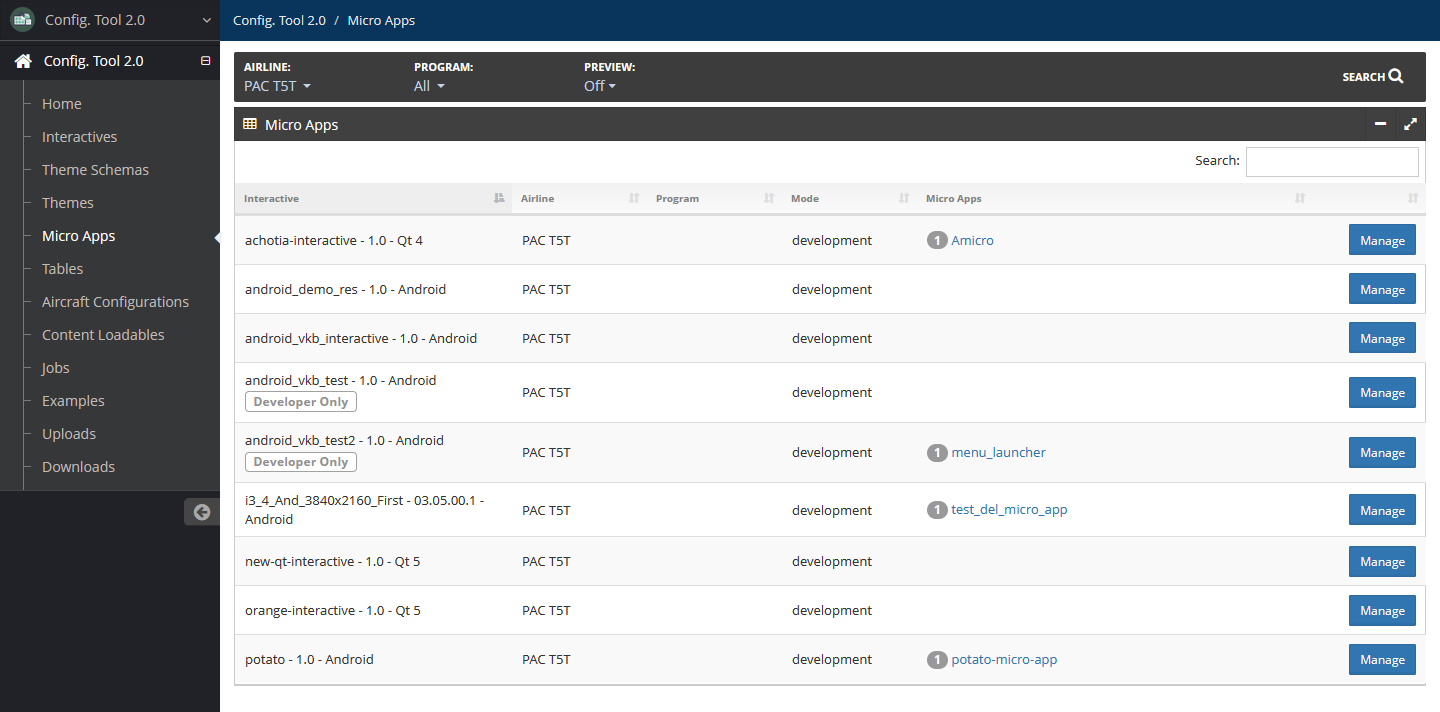
Micro Apps
Micro Apps are applications with limited user interaction, commonly used for display-only pages.
For more information on micro apps, refer to Getting Started: Micro Apps.
Access micro apps by selecting Micro Apps in the left navigation menu.
Export Micro App
Micro apps can be exported to the following formats:
TGZ
OBB (Android micro apps only)
To export a micro app:
On the Micro Apps page, select the micro app to export.
Select Export, then select one of the export options.
The micro app is exported.
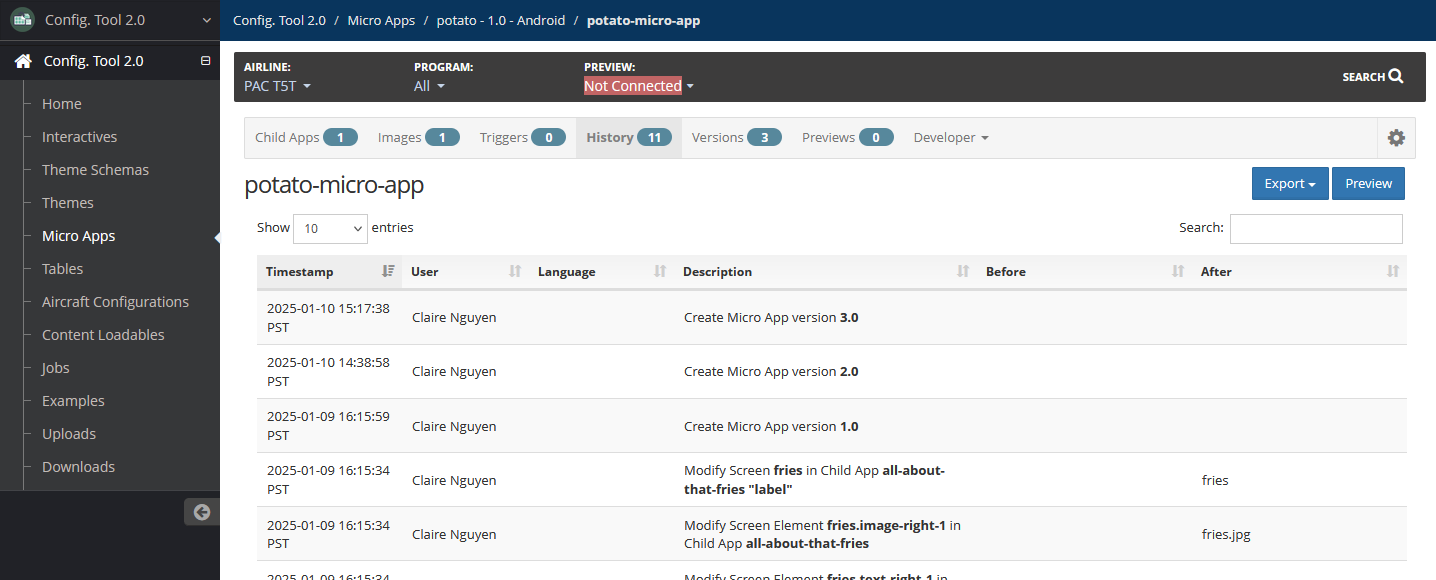
View Micro App History
A history of changes that have been made in your working micro app can be viewed by selecting the History tab.
Child Apps
A child app is a secondary component of a micro app.
Add Child App
To add a child app to a micro app:
In your working micro app, select the Child Apps tab.
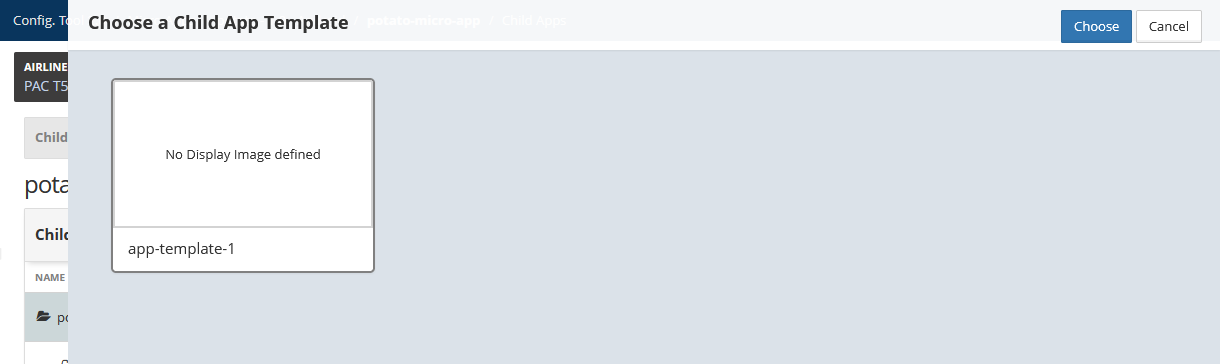
Select Add Child App.
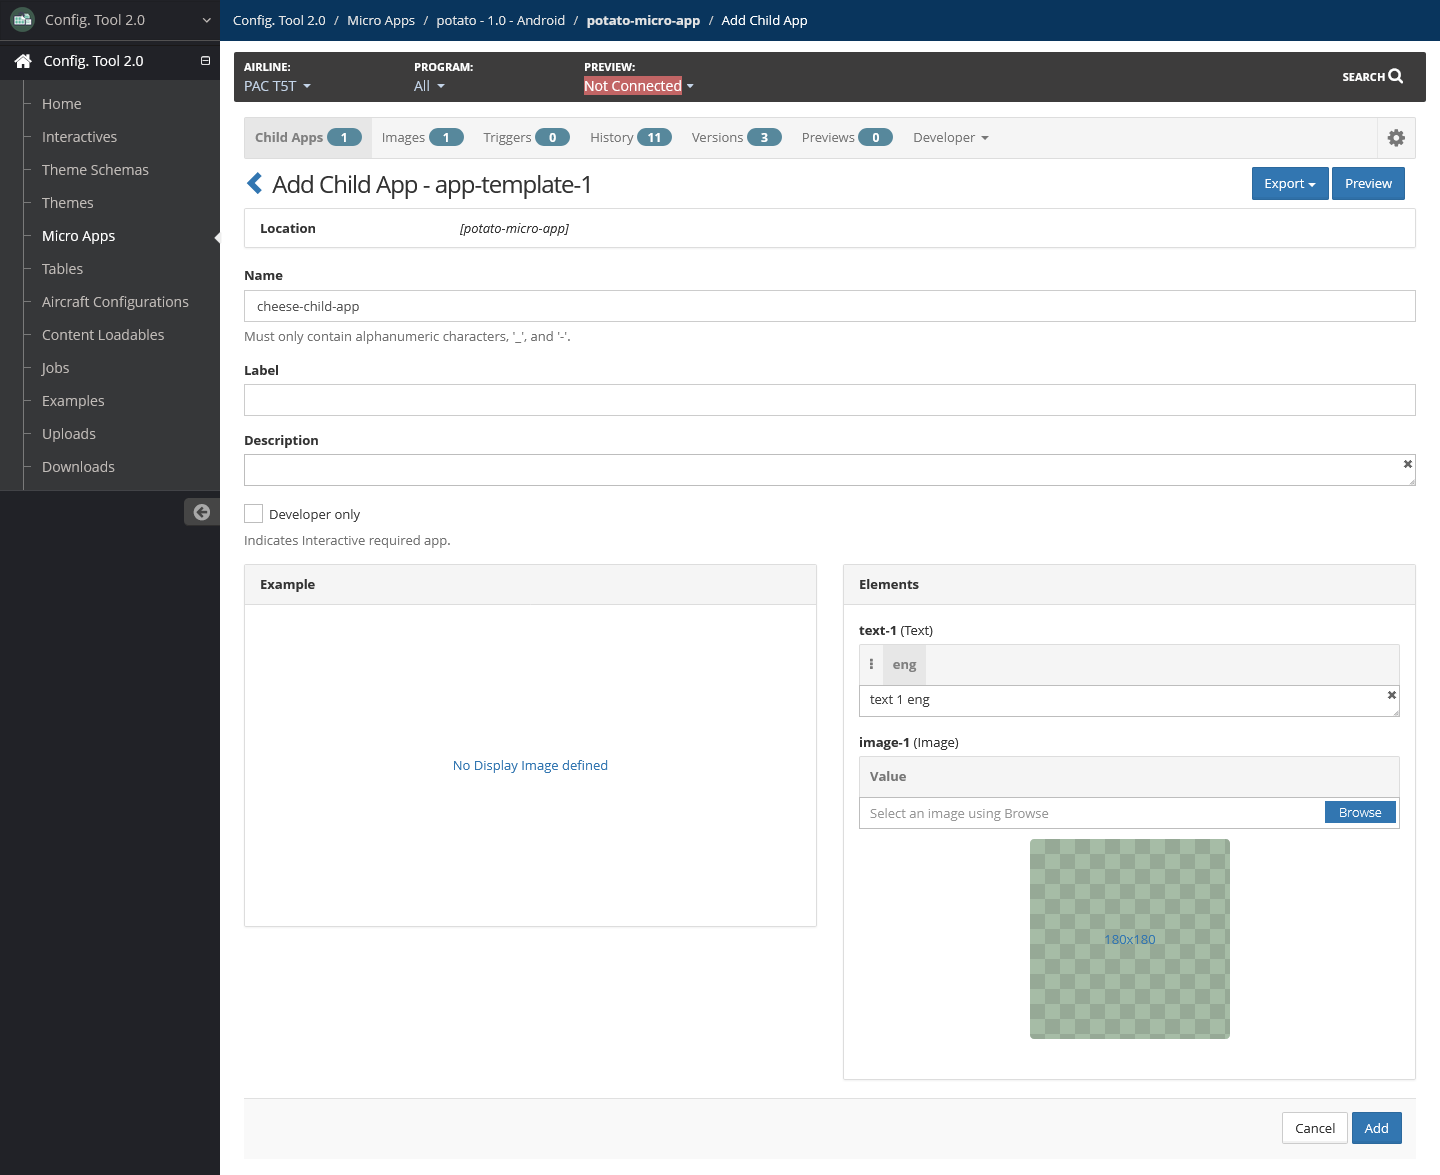
Select a template, then select Choose.
Add the following details:
Name — Required
Name of the child app using only alphanumeric characters, underscores and hyphens.
Label — Optional
Label for the child app. It is not required for the label to be unique from other micro app labels.
Description — Optional
Description about the child app.
Developer only — Optional
Select this checkbox to indicate that the child app is for developer use only.
The default is unselected.
Elements
Text — Select a language and add a text.
Image — Select Browse to browse to and select an image file from your system.
Color — Select a color from the color picker or enter the hexadecimal value of a color with optional alpha values.
List — Select a list.
Link — Enter a link.
Child App Link — Select a Child App Link.
Enum — Select an enum.
Select Add.
Check for Broken Child App Links
Child app links may become broken when a child app version has been reinstated. This check detects and lists any broken links, which can then be immediately remediated.
To check for broken child app links:
In your working micro app on the Child Apps page, select Check Child App Links.
Resolve any broken child app links.
Edit Child App Properties
In your working micro app on the Child Apps page, locate the child app, then select Edit Screens.
Select Child App Actions, then select Edit Child App Properties.
Edit properties as needed.

Select Update.
Screens
A screen is a page layout template used by a child app.
Add Screen
To add a screen:
In your working micro app on the Child Apps page, locate the child app to add a screen, then select Edit Screens.
Select Add.
Select a screen, then select Choose.
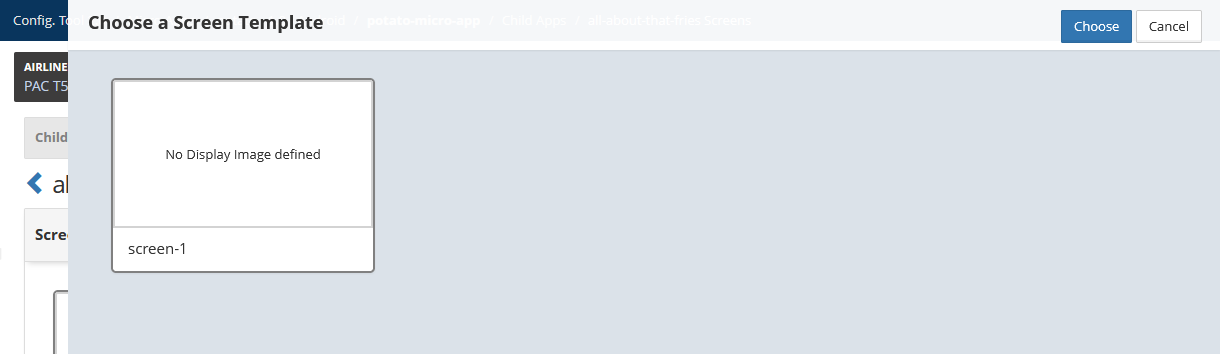
The new screen is added.
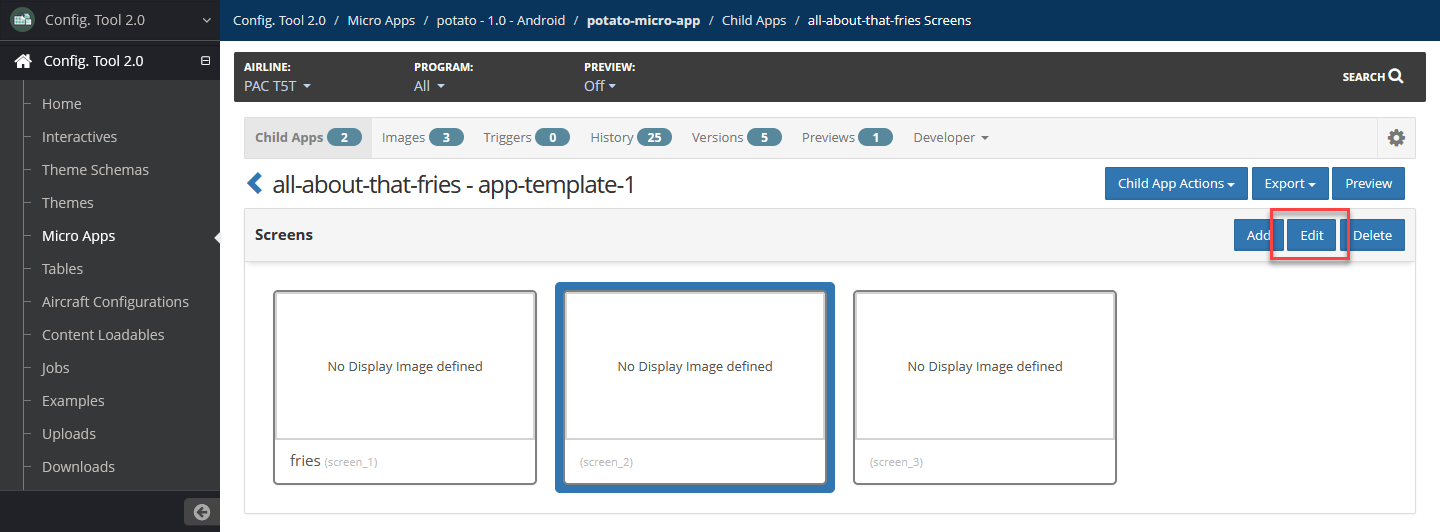
Edit Screen
To edit a screen:
In your working child app, select a screen, then select Edit.
Update the screen as needed. The following are possible elements that can be edited:
Text — Select a language and add a text.
Image — Select Browse to browse to and select an image file from your system.
Color — Select a color from the color picker or enter the hexadecimal value of a color with optional alpha values.
List — Select a list.
Link — Enter a link.
Child App Link — Select a Child App Link.
Enum — Select an enum.
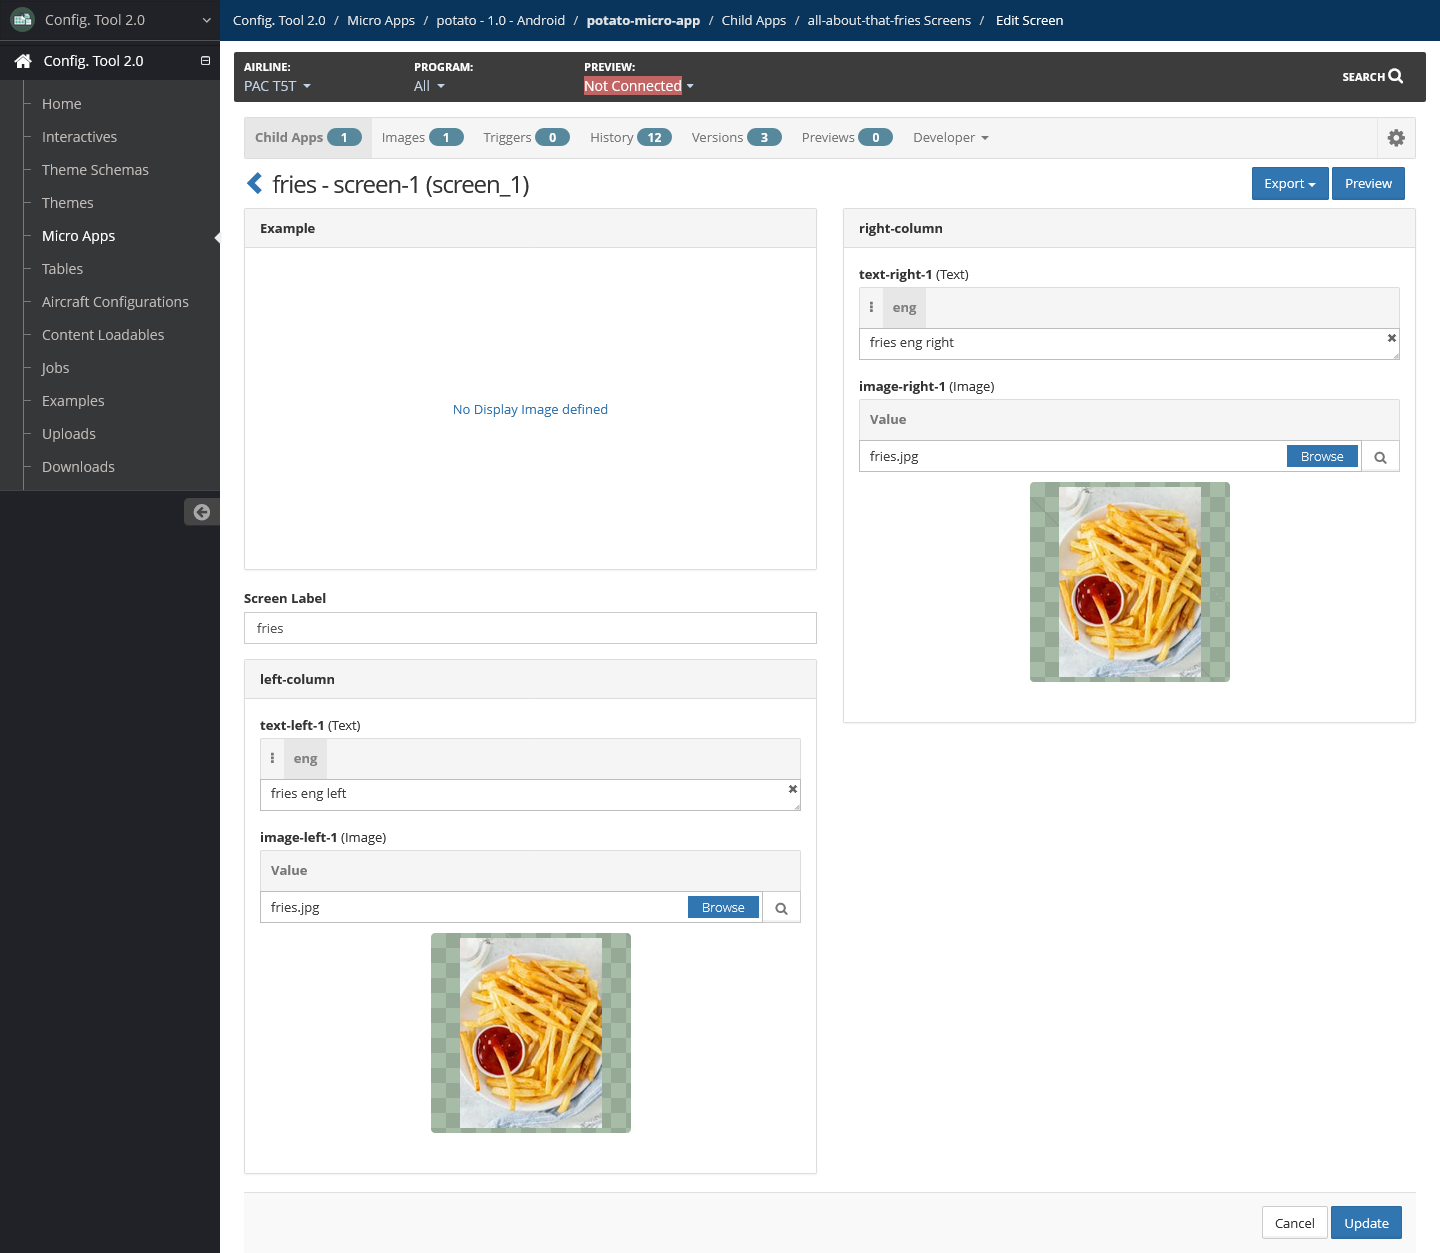
Select Update.
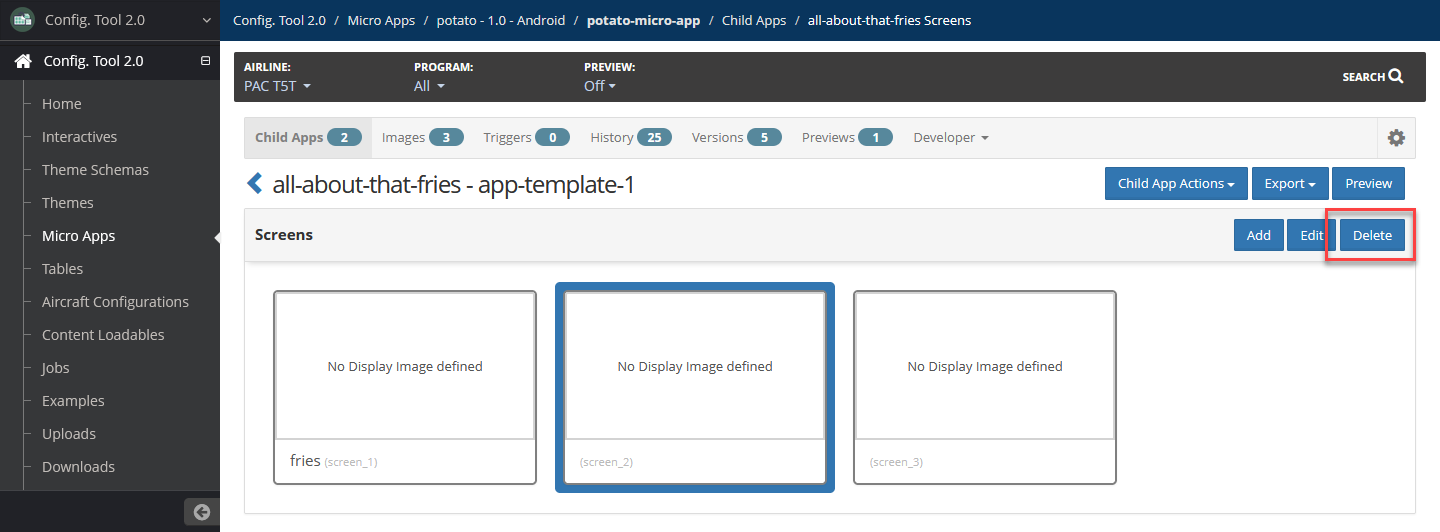
Delete Screen
To delete a screen:
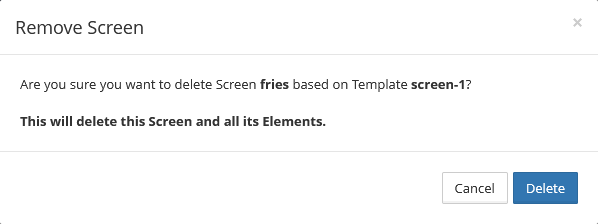
In your working child app, select the screen to delete, then select Delete.
A confirmation message displays. Select Delete.
Images
Micro apps contain an inventory of images.
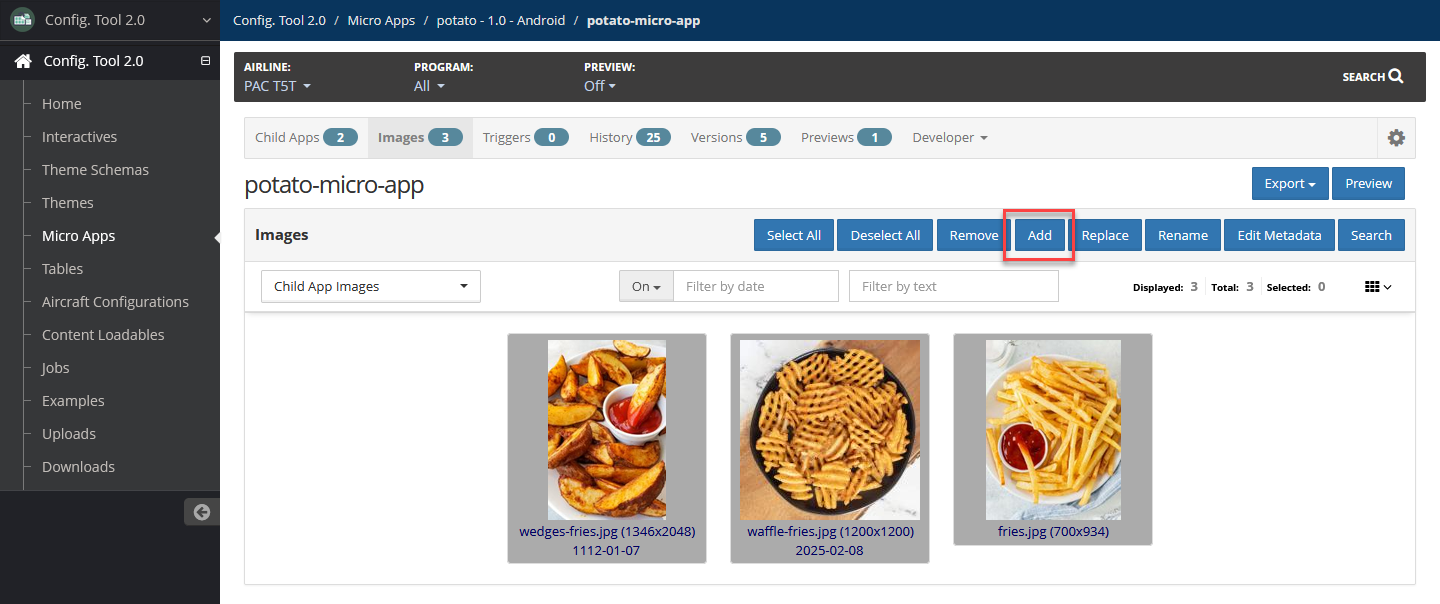
Add Image
To add an image to a micro app:
In your working micro app, select the Images tab.
Select Add.
You can add an individual image file or a zip file containing multiple images. Select Browse under Image File, then browse to and select the image or zip file from your system.
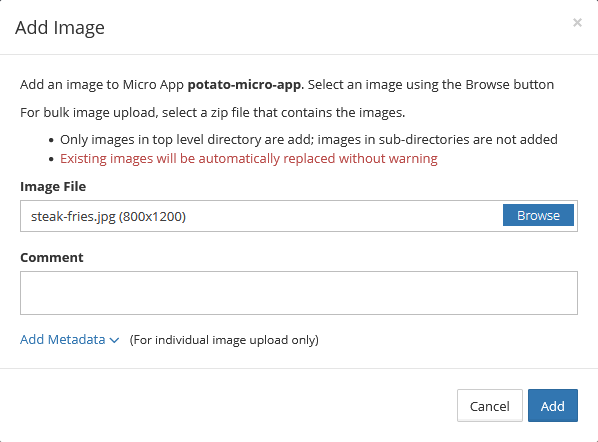
In the Comment field, add a comment to describe the image upload, if needed.
For individual image uploads, you can add metadata.
Select Add Metadata
Add the following details:
Date — Use the date picker to select a date or manually enter a valid date in YYYY-MM-DD format.
Info — Use this field to add general information about the image or images.
Tags — Add a comma-separated list of strings. This can be used to filter images when searching.
Select Add.
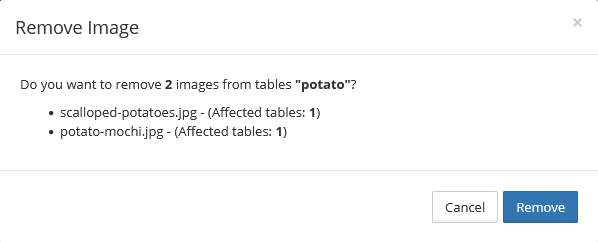
Remove Image
You can remove one or multiple images at a time.
To remove images:
In your working micro app on the Images page, select the images to remove, then select Remove.
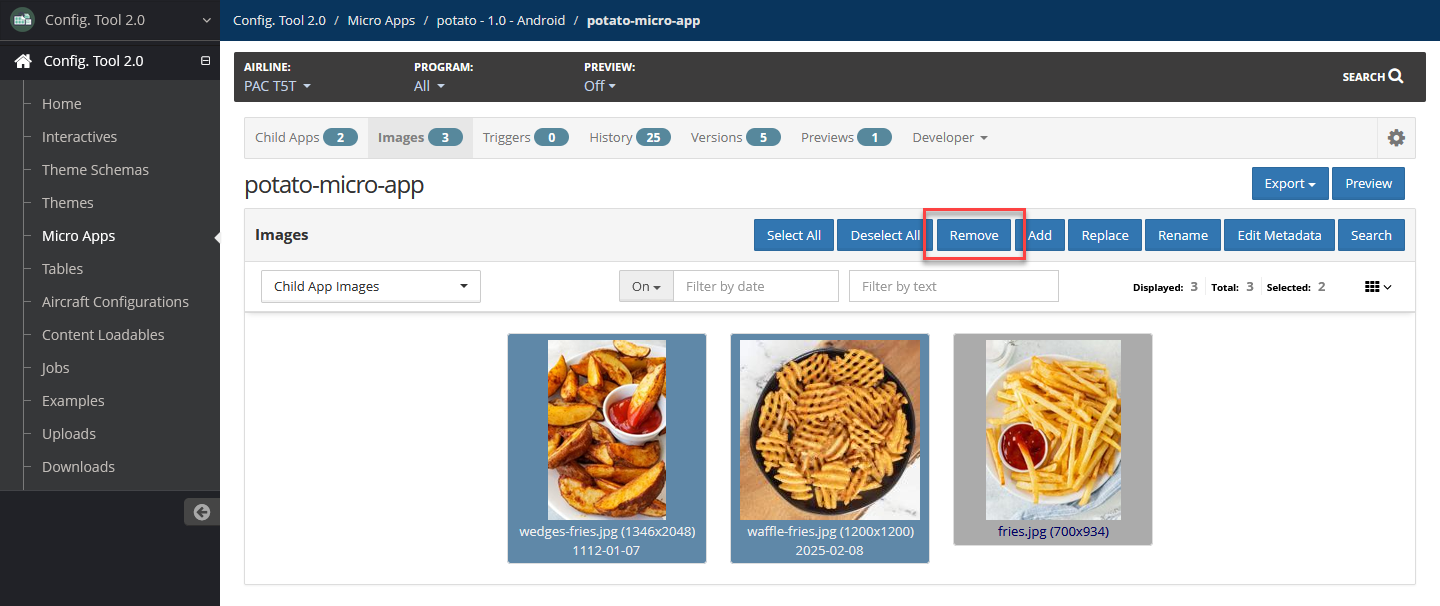
A confirmation message displays. Select Remove.
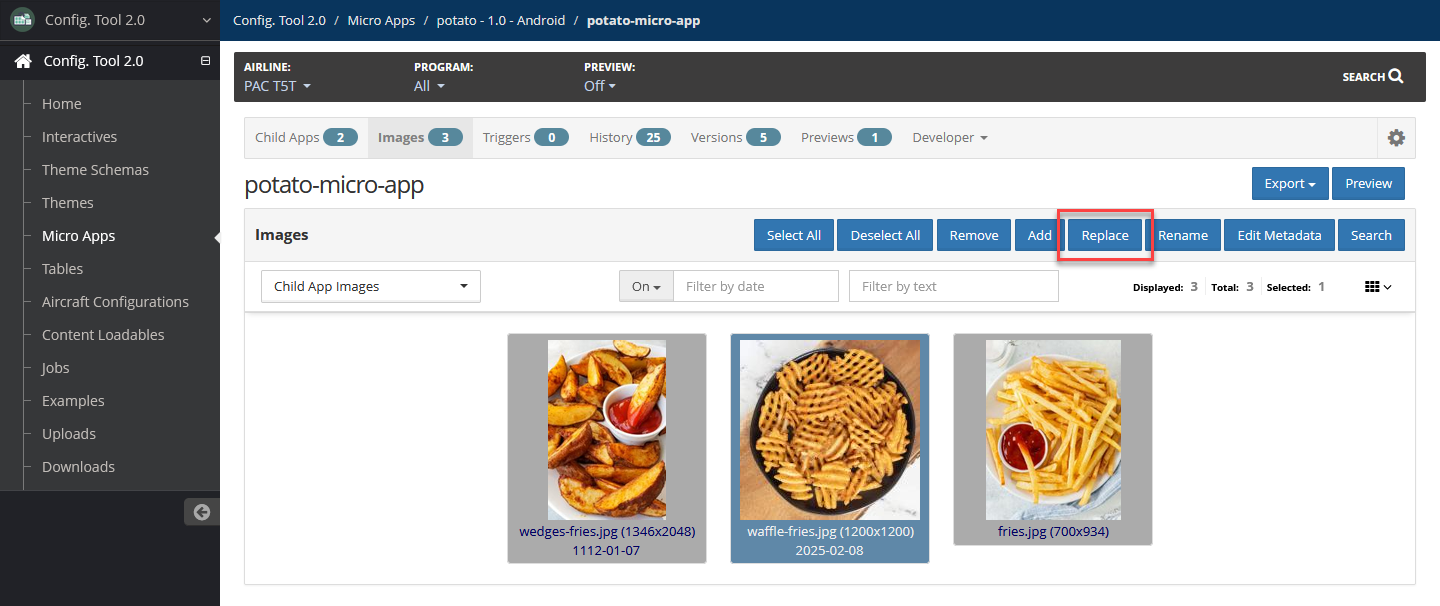
Replace Image
To replace an image:
In your working micro app on the Images page, select the image to replace, then select Replace.
Select Browse in the Image File field to browse to and select the new image file from your system.
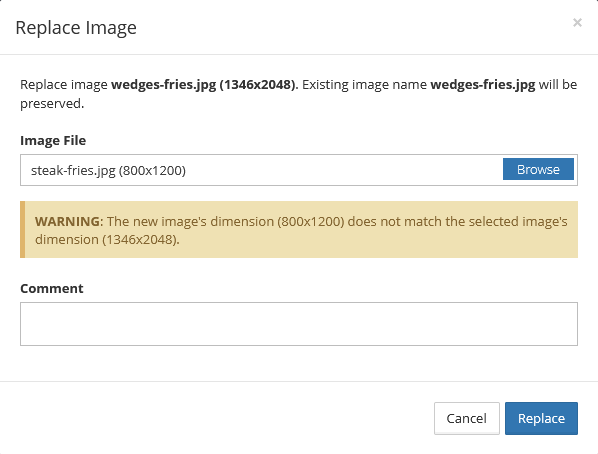
In the Comment field, enter a comment about the image replacement, if needed.
Select Replace.
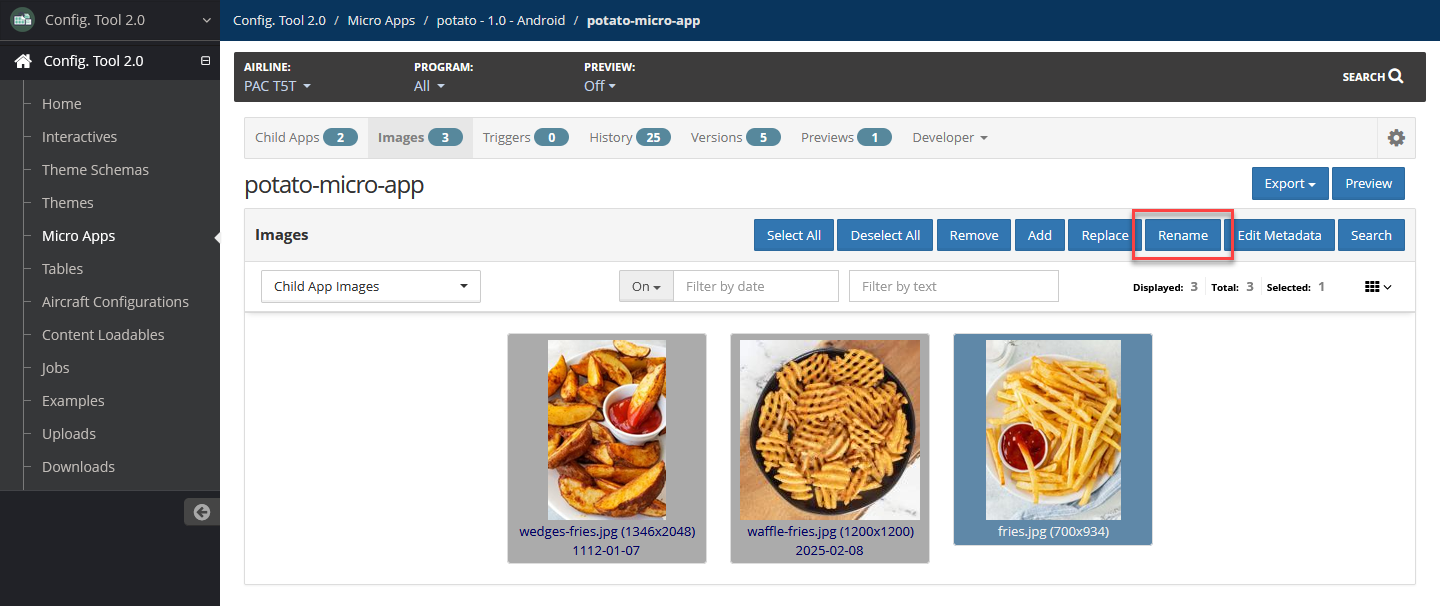
Rename Image
To rename an image:
In your working micro app on the Images page, select the image to rename, then select Rename.
In the Name field, enter a new name.
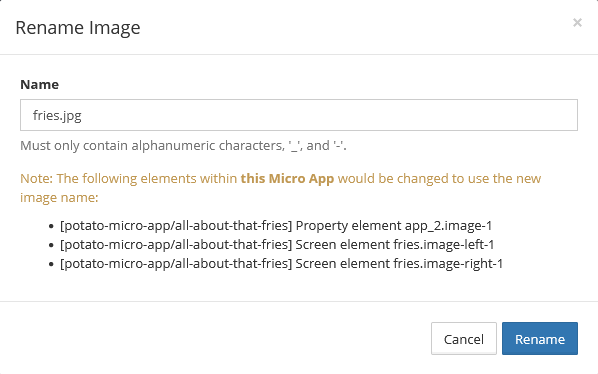
Select Rename.
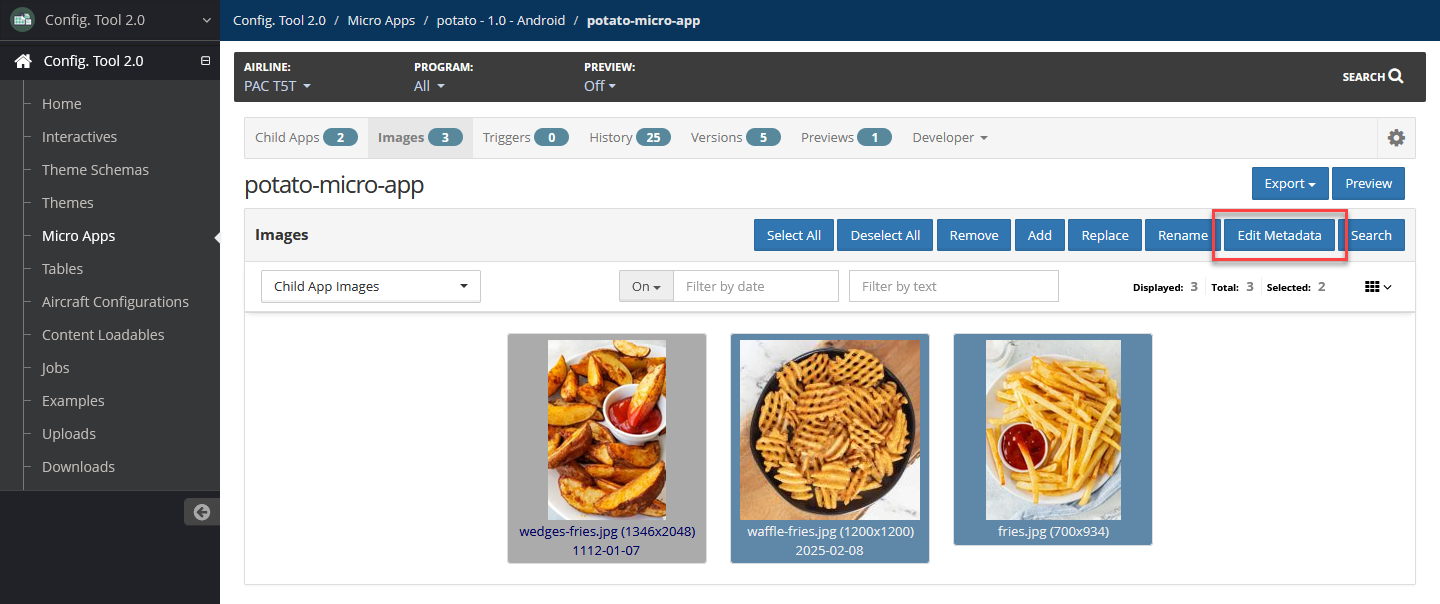
Edit Image Metadata
You can edit the metadata of one or multiple images at a time.
To edit metadata of one or more images:
In your working micro app on the Images page, select the images, then select Edit Metadata.
Update the following as needed:
Date — Use the date picker to select a date or manually enter a valid date in YYYY-MM-DD format.
Info — Use this field to add general information about the image or images.
Tags — Add a comma-separated list of strings. This can be used to filter images when searching.
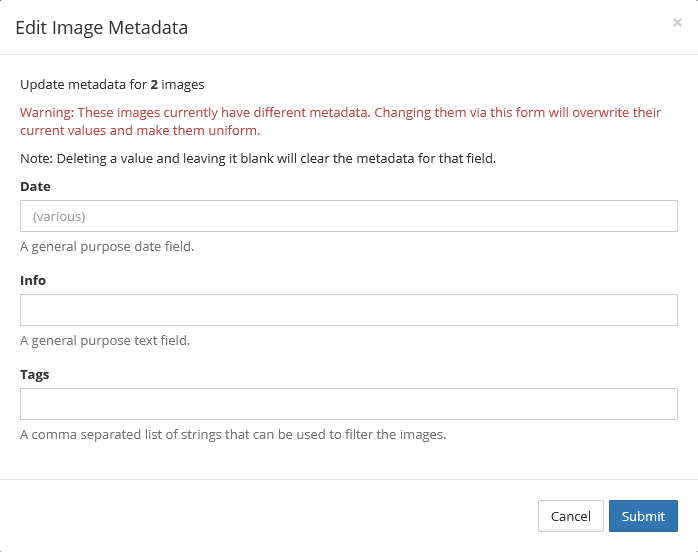
Select Submit.
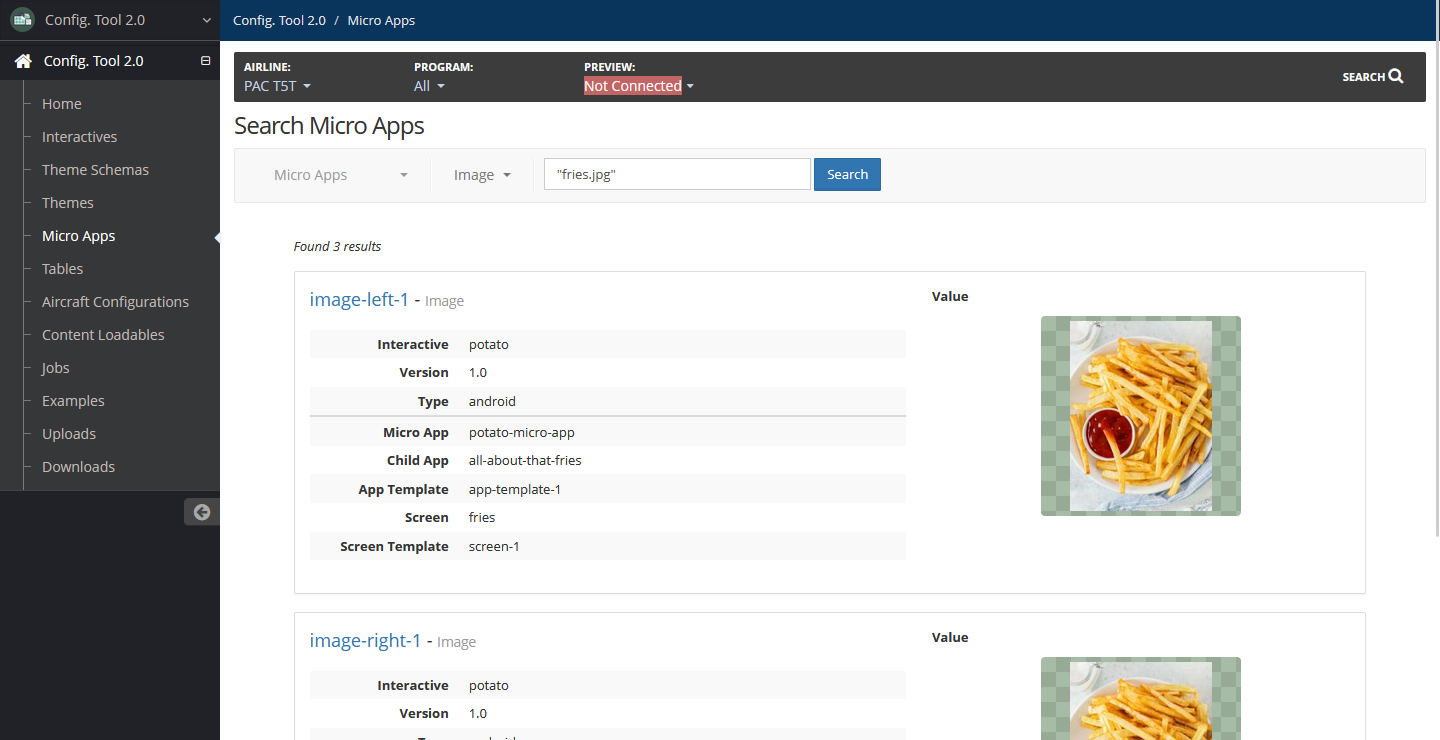
Search for Image
You can search for one or multiple images at a time.
To search for images:
In your working micro app on the Images page, select the images.
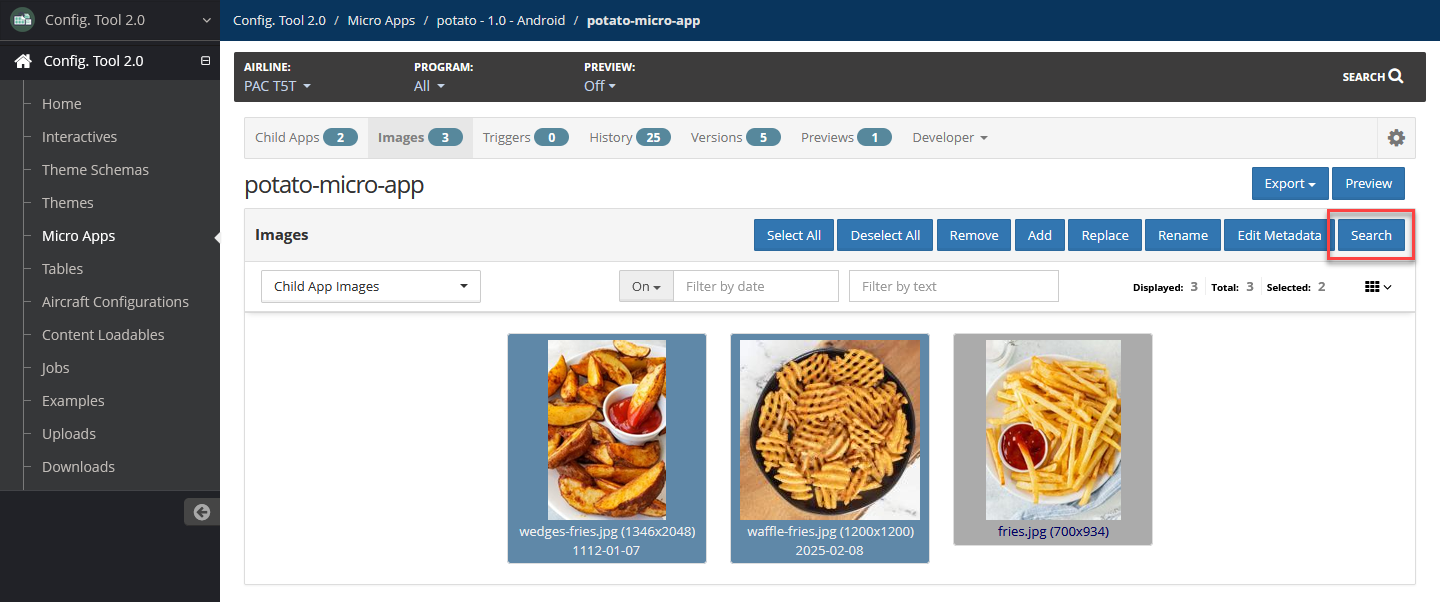
Select Search.
In a new tab, the Search page displays locations and details on where the image is used.
Triggers
A trigger is a condition that must be met for content loadable files to be used. You can define one or multiple triggers for a micro app.
Trigger options include:
Route — To and from destinations
Date Range — Beginning and end dates
Customer-Defined — Key-value pair
Add Trigger
To add a trigger:
In your working micro app, select the Triggers tab.
Select Edit Triggers.
Select Add Trigger.
Select Add, then select and add details for one of the following:
Route — Enter From and To destinations.
Date Range — Enter Start and End dates.
Customer-Defined — Enter a Key and Value.
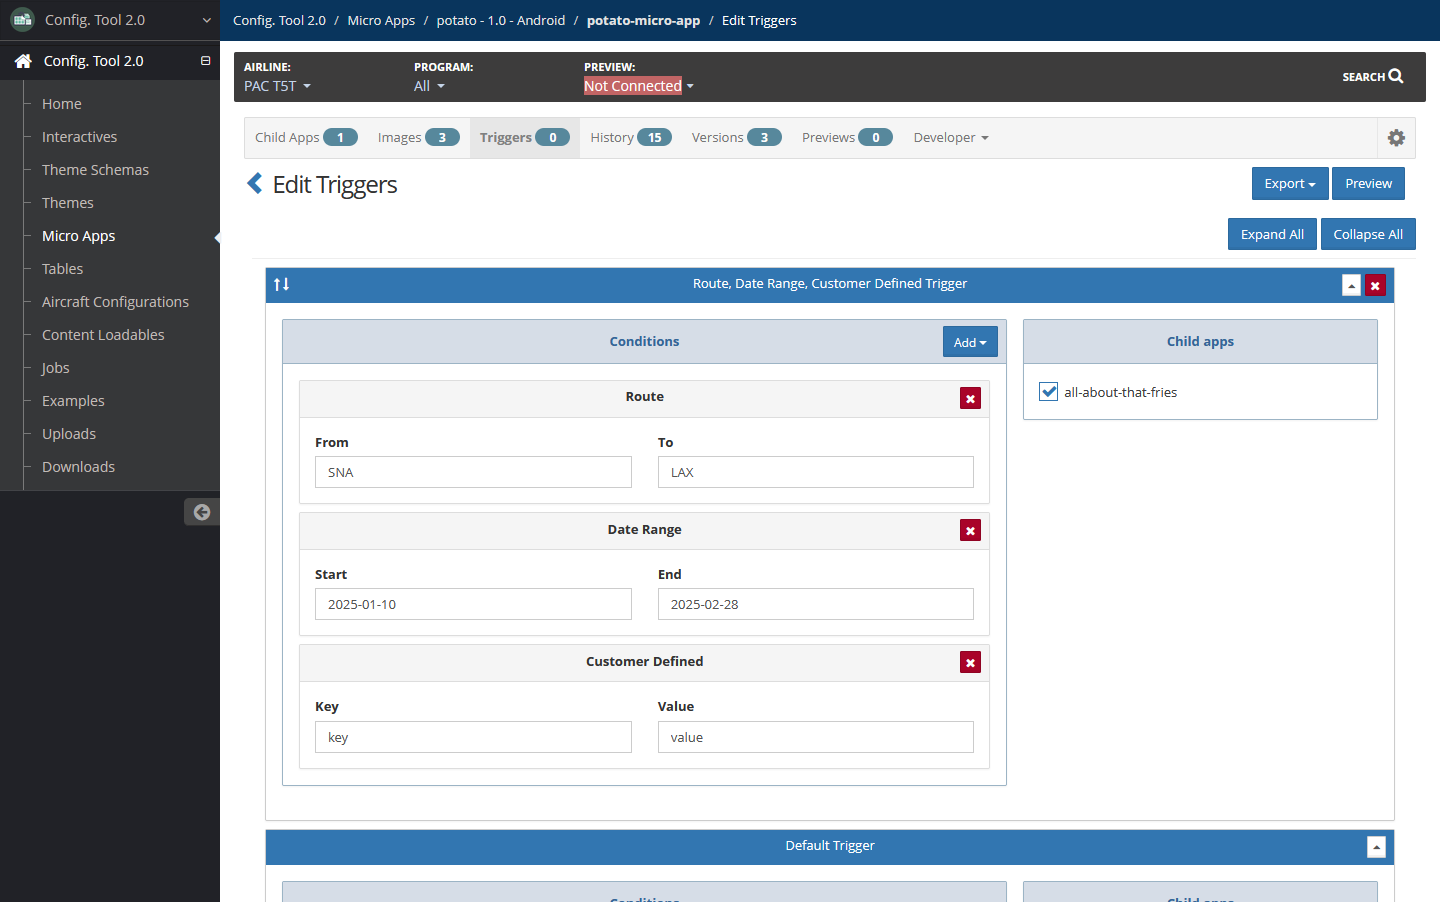
You can add multiple conditions for each trigger.
Select child apps to which the trigger should be applied, if any.
Select Update.
Edit Trigger
To edit a trigger:
In your working micro app, select the Triggers tab.
Select Edit Triggers.
Locate and update the trigger as needed.
Select Update.
Versions
Create Micro App Version
To create a micro app version:
In your working micro app, select the Versions tab.
Select Create Micro App Version, then select From current Config Tool values or From Child App versions.
Add the following details:
Version — Required
Unique version number using only alphanumeric characters, underscores and hyphens.
Description — Optional
Description about the new micro app version.
Child app versions — This option is only available if From Child App versions was selected.
Only child apps that contain versions will be available to be part of this micro app version.
For each available child app, select a version or select None. The latest is selected by default.

Select Add.
Reinstate Micro App Version
Reinstating a micro app version overwrites all current active content of the micro app.
To reinstate a micro app version:
In your working micro app on the Versions page, locate the micro app version to reinstate.
Select Actions, then select Reinstate.
If contents of the version you want to reinstate does not match the contents of the current micro app, there will be a warning.
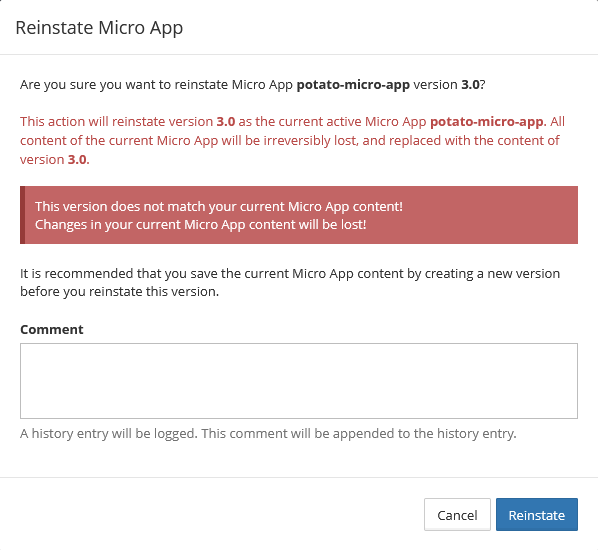
Add a comment if necessary, then select Reinstate.
Create Child App Version
To create a child app version:
In your working micro app on the version page, locate the child app to create a version, then select Create Child App Version.
Add the following details:
Version — Required
Unique version number using only alphanumeric characters, underscores and hyphens.
Description — Optional
Description about the new child app version.

Select Add.
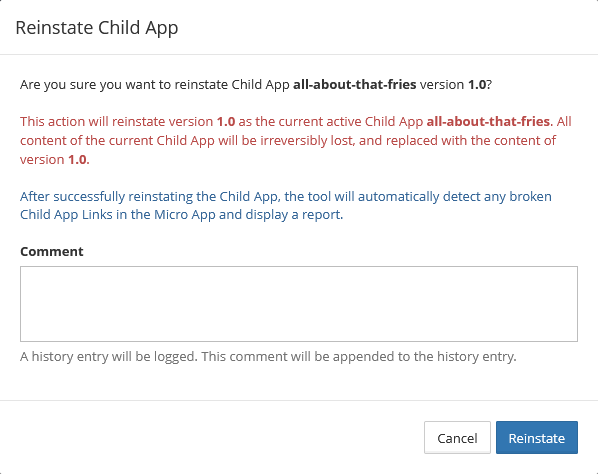
Reinstate Child App Version
Reinstating a child app version overwrites all current active content of the child app.
To reinstate a child app version:
In your working micro app on the Versions page, locate the child app version to reinstate.
Select Actions, then select Reinstate.
Add a comment if necessary, then select Reinstate.
Delete Child App Version
To delete a child app version:
In your working micro app on the Versions page, locate the child app version to delete.
Select Actions, then select Delete.
A confirmation page displays. Select Delete to confirm.
Export Micro App Version
To export a micro app version:
In your working micro app on the version page, locate the micro app version.
Select Actions, then select Export (to Tgz) or Export (to OBB).
The micro app version is exported.
View Micro App Version History
A micro app version history displays a catalog of changes between the selected version and the previous version, such as changes to properties, child app creations or removal of versions.
To view a micro app version's history:
In your working micro app on the version page, locate the micro app version.
Locate the micro app version. Select Actions, then select Show history. A history panel displays a list of changes between the selected version and the previous version.
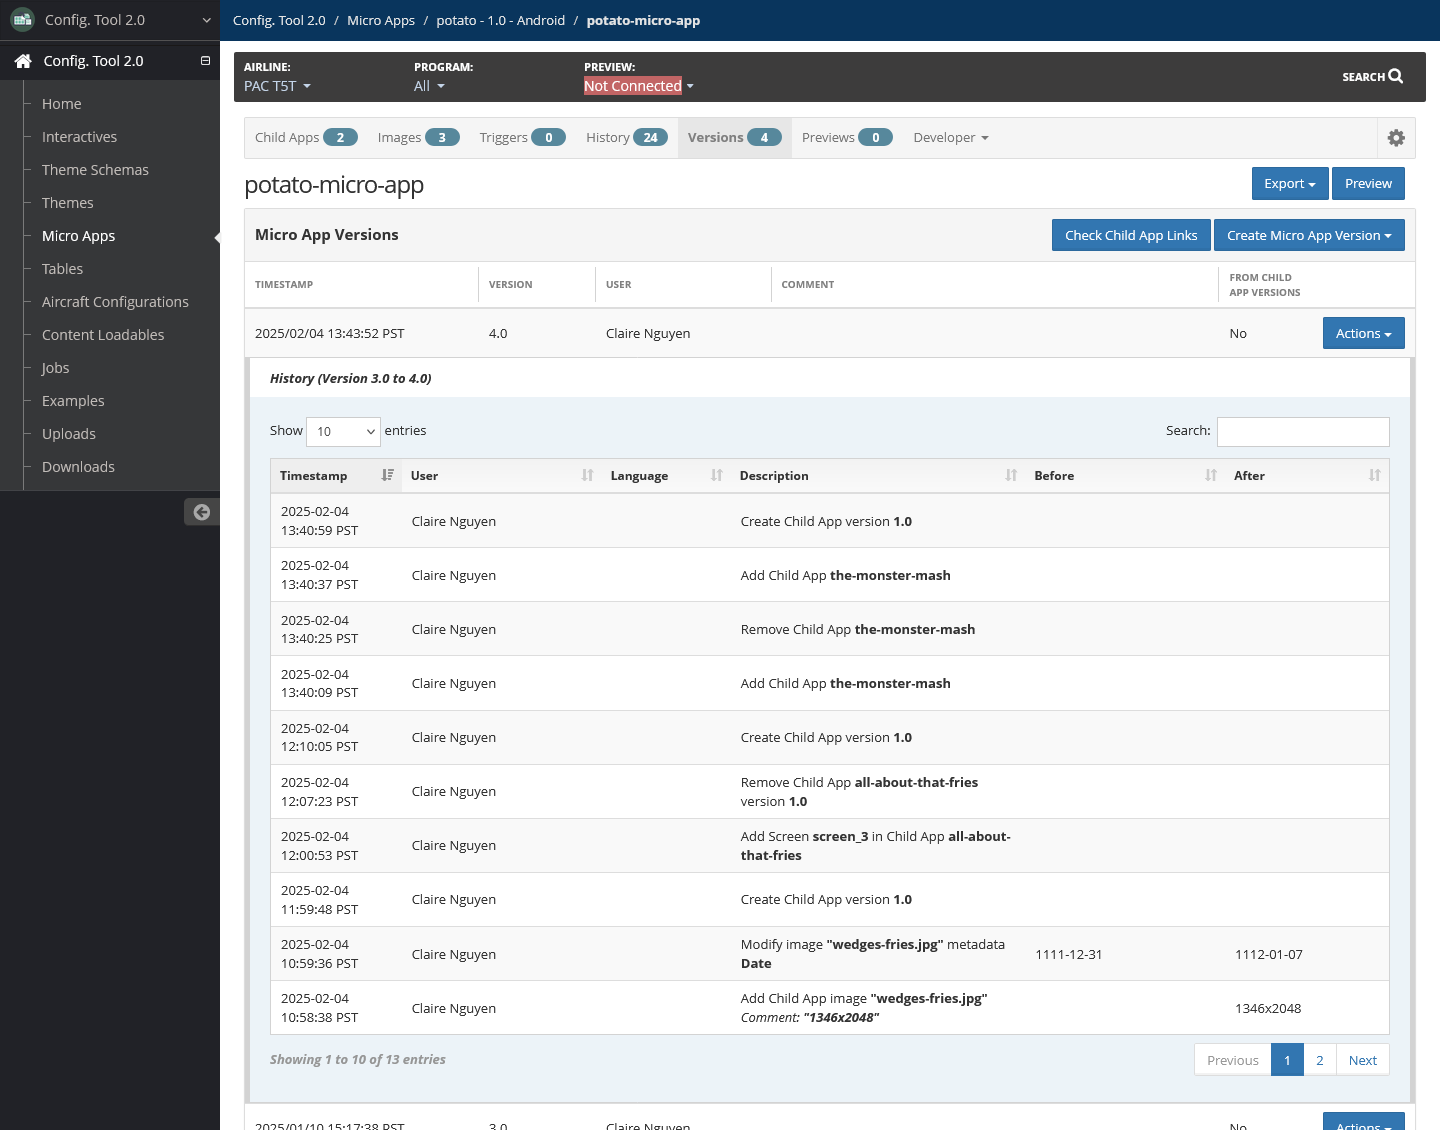
To close the history panel, select Actions, then select Hide history.
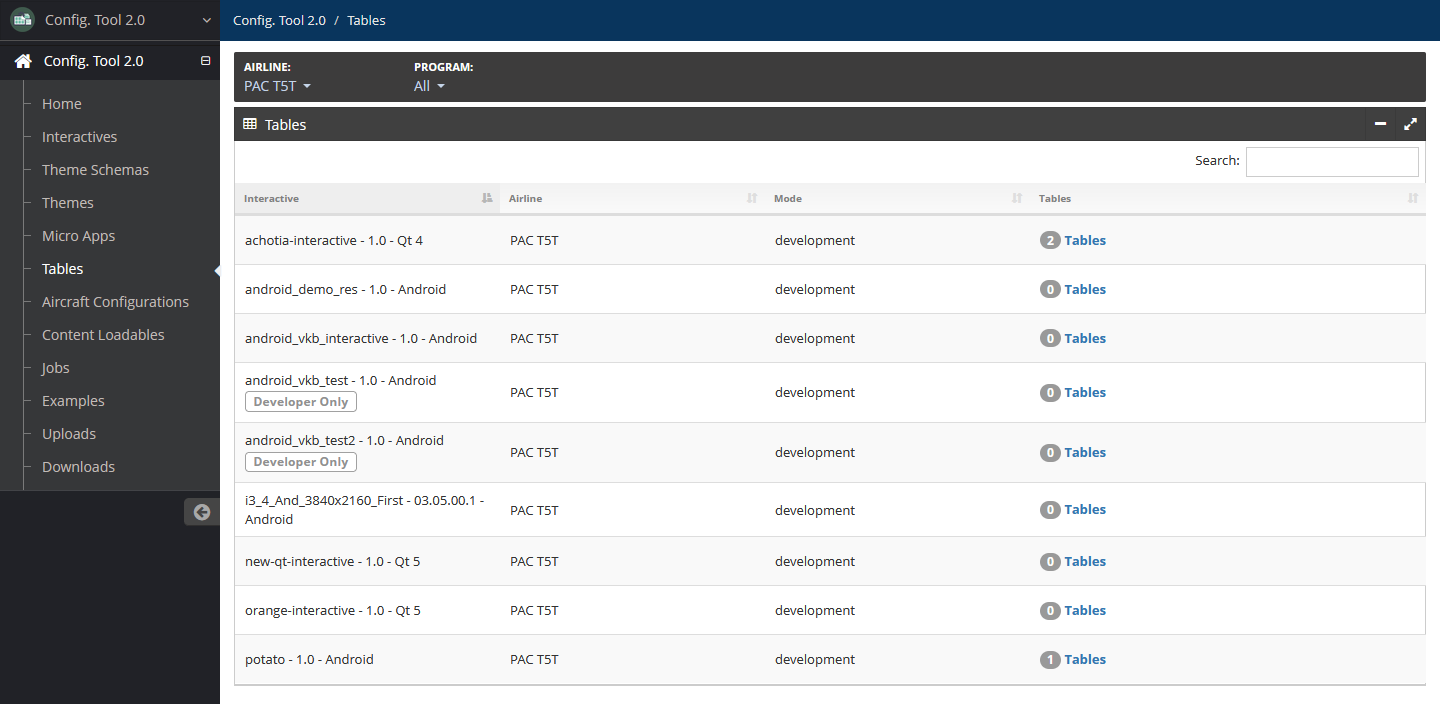
Tables
For more information on tables, refer to Getting Started: Tables.
Access tables by selecting Tables in the left navigation menu.
Edit Table
To edit a table:
On the Tables page, locate the interactive containing the table to edit, then select Tables.
Select the Tables tab.
Locate the table you want to edit, then select it or Edit Data.
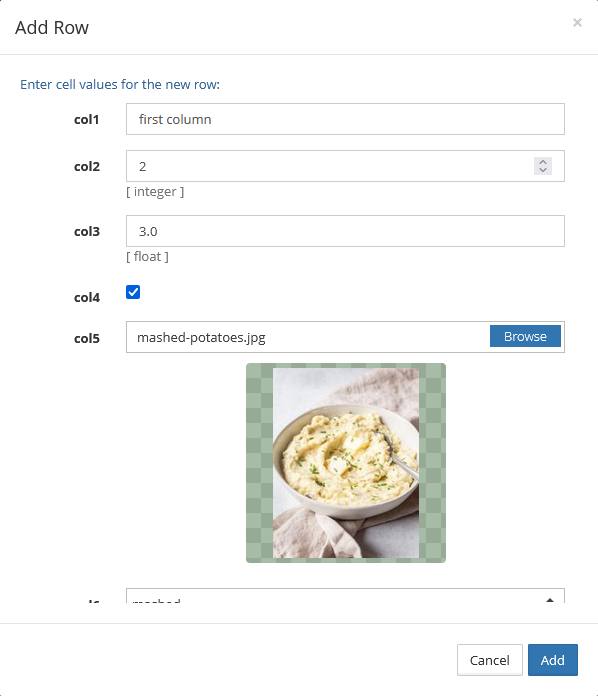
To add a row:
Select Add.
Add values to each column as needed, then select Add.
To modify a cell value, select the cell to enter edit mode, then modify the value.
Once you select an area outside of the cell, the value is automatically saved.
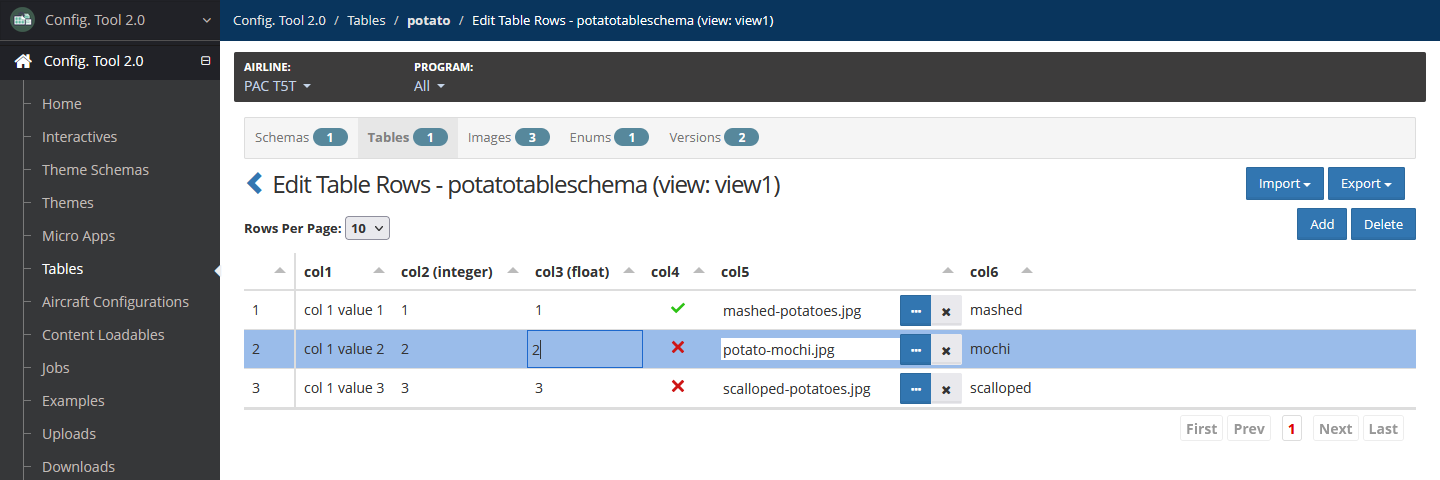
To delete one or multiple rows, select the rows, then select Delete. Confirm by selecting Delete again.
Images
Images can be added, replaced, renamed or removed. Additionally, image metadata can be added or modified.
Add Image
To add an image:
In your working table, select the Images tab.
Select Add.
You can add an individual image file or a zip file containing multiple images. Select Browse under Image File, then browse to and select the image or zip file from your system.
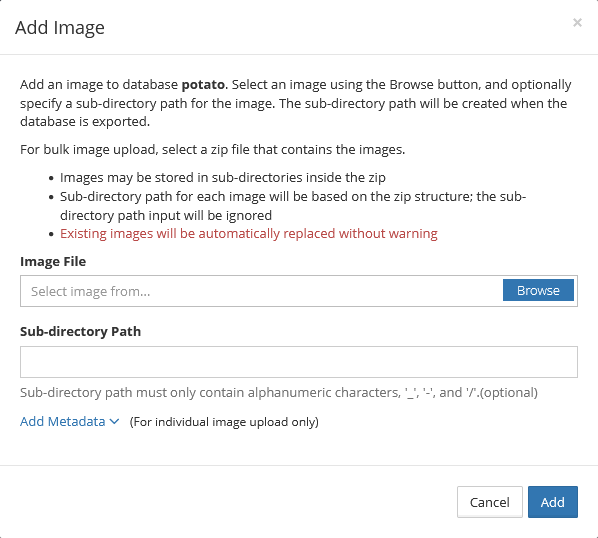
Add a sub-directory path and comment if needed.
For individual image uploads, you can add metadata.
Select Add Metadata
Add the following details:
Date — Use the date picker to select a date or manually enter a valid date in YYYY-MM-DD format.
Info — Use this field to add general information about the image or images.
Tags — Add a comma-separated list of strings. This can be used to filter images when searching.
Select Add.
Replace Image
To replace an image:
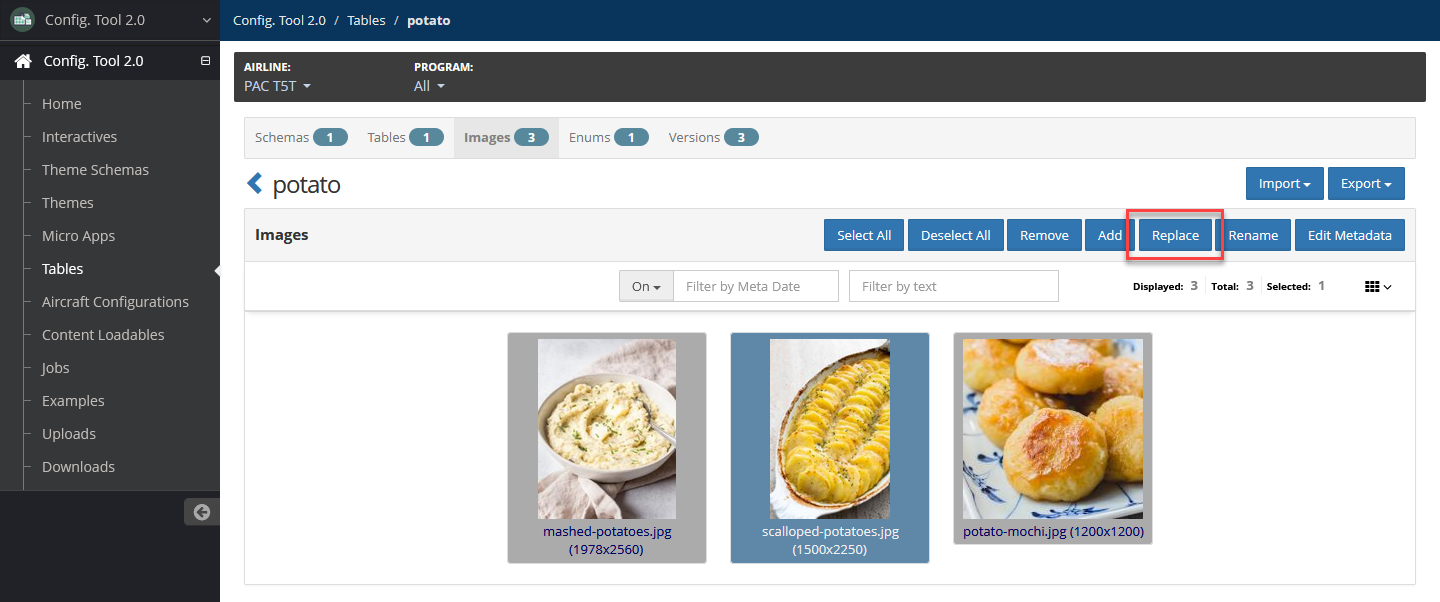
In your working table, select the Images tab.
Select the image to replace, then select Replace.
Select Browse to browse to and select the replacement image from your system.
Select Replace.
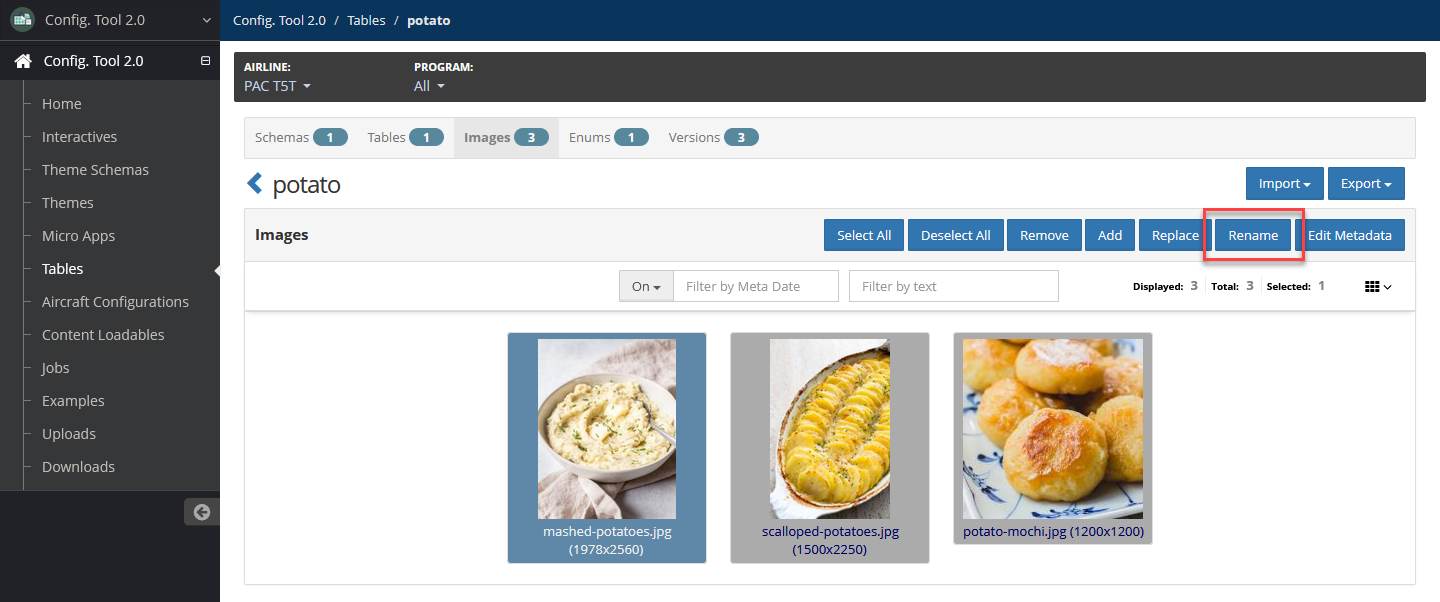
Rename Image
To rename an image:
In your working table, select the Images tab.
Select the image to rename, then select Rename.
Modify the name of the image.
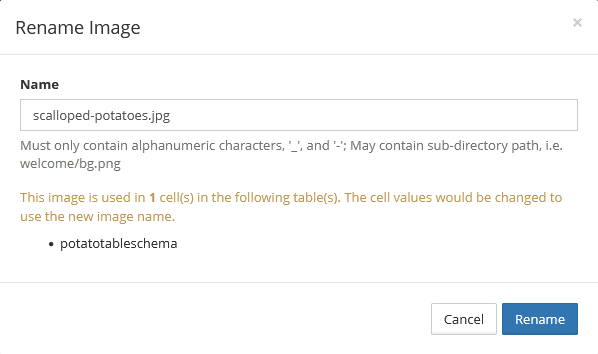
Select Rename.
Remove Image
You can remove one or multiple images at a time.
To remove images:
In your working table, select the Images tab.
Select one or more images to remove, then select Remove.
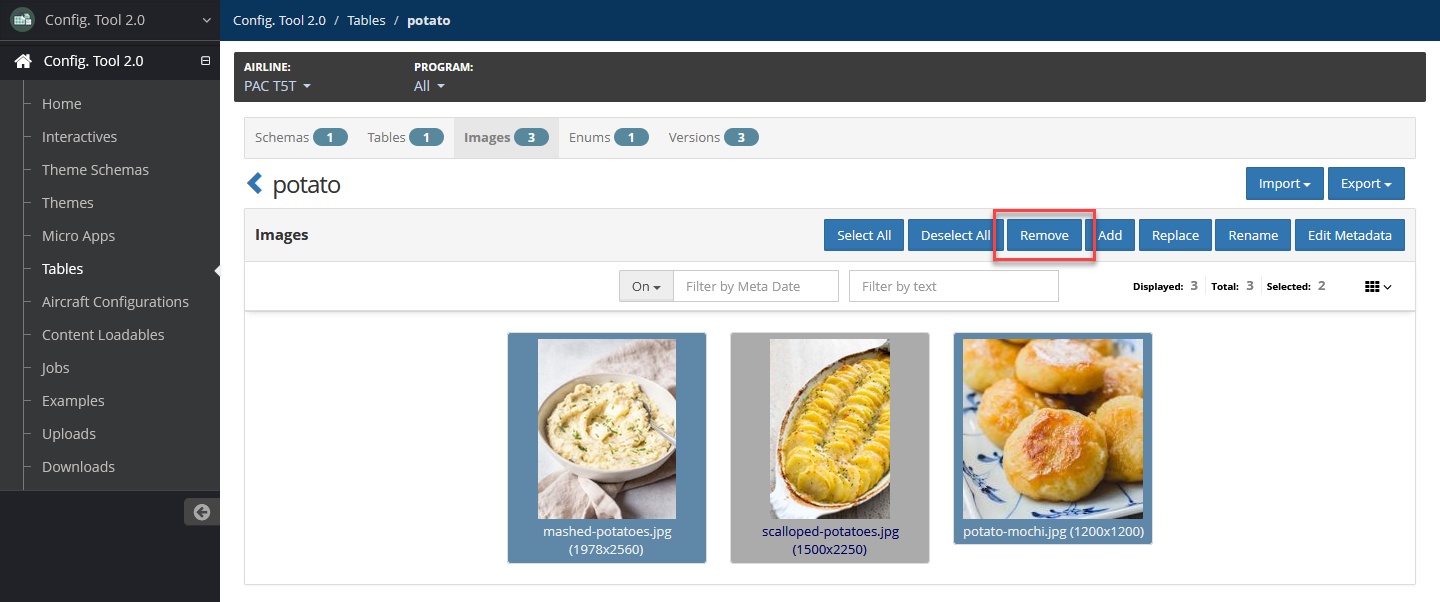
Confirm the removal of images by selecting Remove.
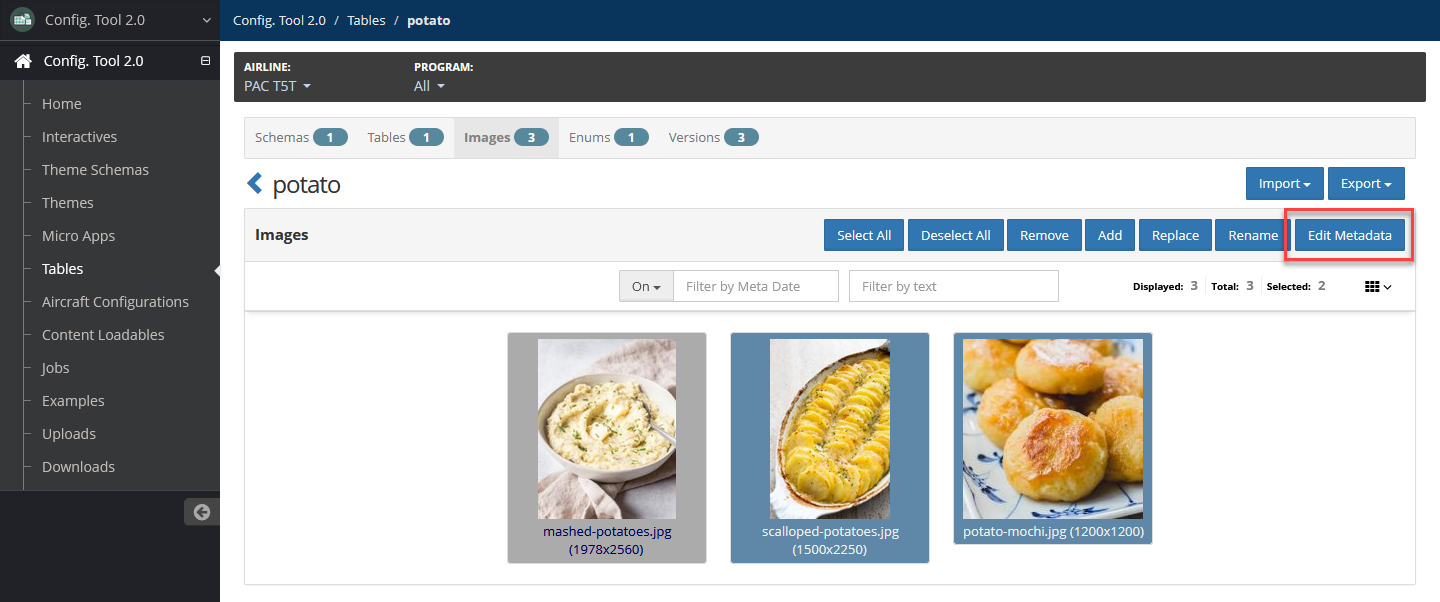
Edit Image Metadata
You can edit the metadata of one or multiple images at a time.
To edit the metadata of images:
In your working table, select the Images tab.
Select one or more images, then select Edit Metadata.
Add or edit the following:
Date — Use the date picker to select a date or manually enter a valid date in YYYY-MM-DD format.
Info — Use this field to add general information about the image or images.
Tags — Add a comma-separated list of strings. This can be used to filter images when searching.
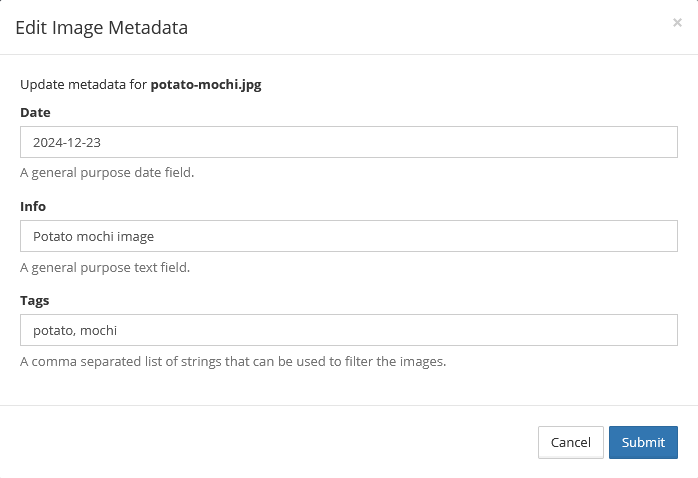
Select Submit.
Enums
Edit Enum
To edit an enum:
In your working table, select the Enums tab.
Locate the enum you want to modify. Select the enum, or select Actions, then Edit.
Modify the following as needed:
Name — Required
Name of the enum using only alphanumeric characters, underscores and hyphens.
Values
Add enum values by selecting the + icon, then adding a value to the provided field.
Remove an enum value by select the x icon.
Reorder enum values by using the ↑↓ icon of an enum to drag and drop the enum value to a new location.

Select Update.
Versions
Create Version
To create a table version:
In your working table, select the Versions tab.
Select Create Version.
Add the following details:
Version — Required
Version number using only alphanumeric characters, underscores and hyphens.
Comment — Optional
A brief description of this new version.
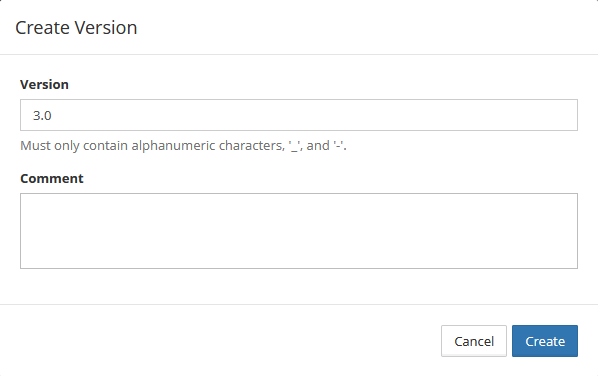
Select Create.
Export Version
To export a table version:
In your working table, select the Versions tab.
Locate the version to export.
Select Action, then select one of the following options:
Export to Sqlite
Export to Spreadsheet
Export to OBB
Previews
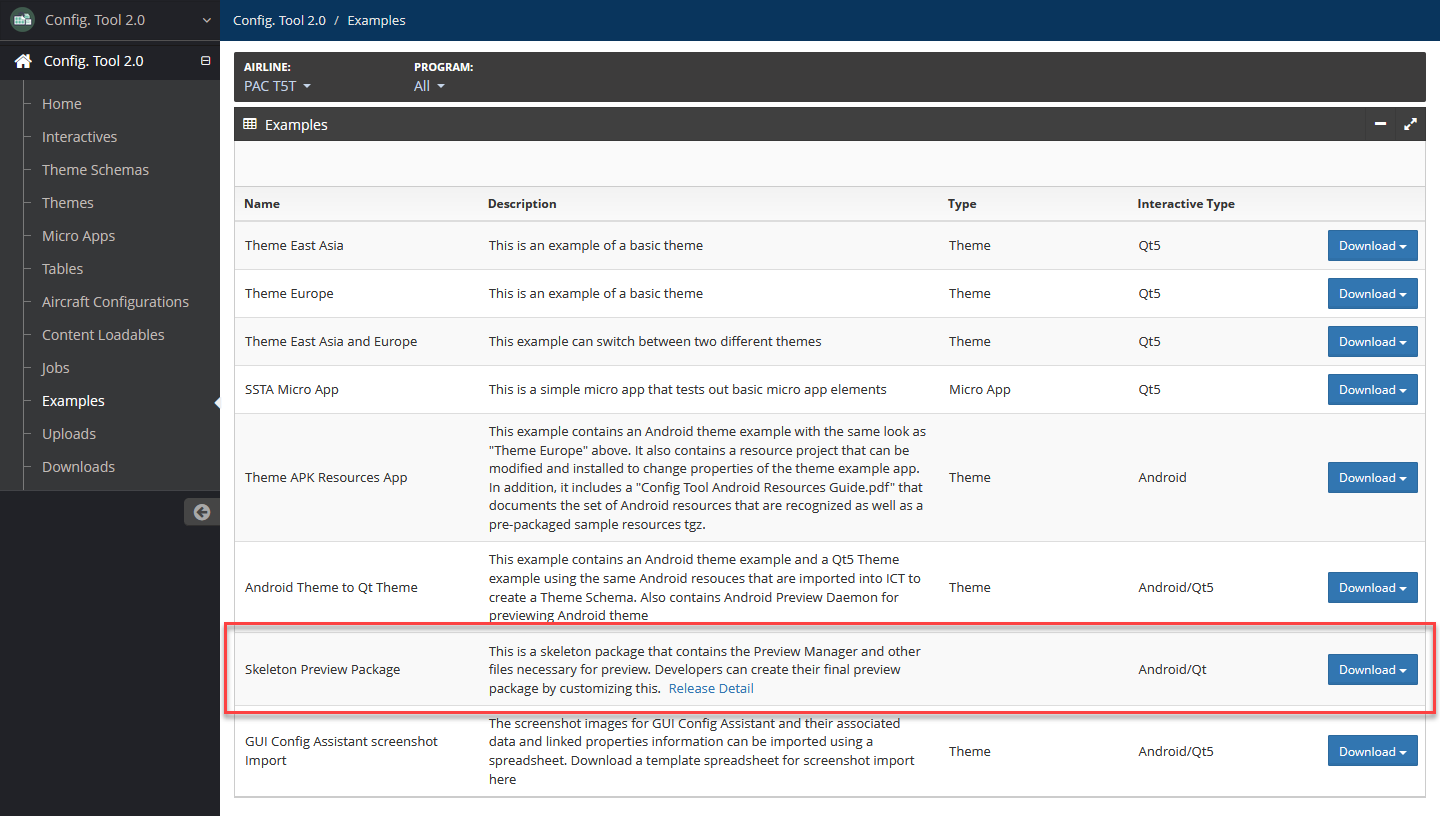
The preview feature is an optional Windows PC program package that Panasonic supplies that shows how an interactive, micro app or child app displays using a specific theme.
For more information on previews, refer to Getting Started: Previews.
The following are steps to preview a theme or micro app:
Start Preview Manager.
Create or locate the preview package and install it.
Preview the theme or micro app using Preview Manager.
Preview Manager
Start Preview Manager
Start the preview manager application if it it not already running.
Verify that the preview feature is connected in Config Tool 2.0.
In the left navigation menu, select Interactives.
Under Preview, select dropdown to display the preview toggle switch.
Select the toggle switch to display Preview On.
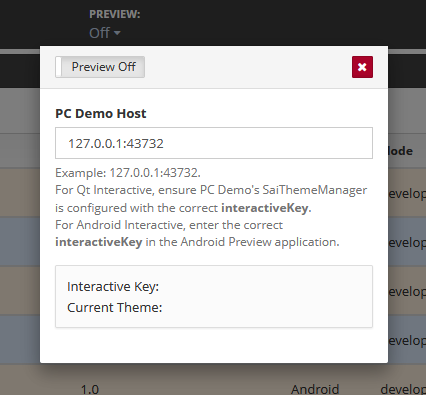
The Preview Manager displays in a separate window.
Use Preview Manager
To use Preview Manager:
Open the Preview Manager window. The appearance of this window depends on your organization.
Select one of the following:
Start Fresh — Select this if this is the first time you started Preview Manager.
Start — Select this for subsequent previews.
Your preview then displays in the Preview Manager window.
If you chose to include multiple sections in your preview, then they will display as options at the end of the page. Select a section to preview the layout.
Create and Install Preview Package
To view a preview, you must run a job to create a preview package. When the job is complete, install the preview package to view it in Preview Manager.
Create Theme Preview
To create a theme preview:
On the Themes page, select the theme to preview.
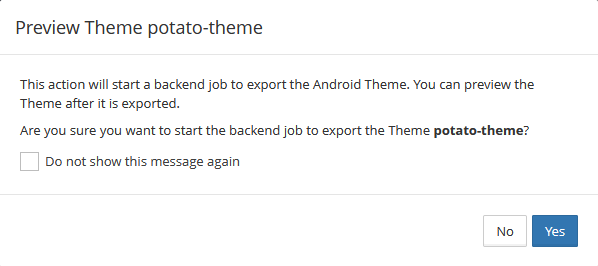
Select Preview.
Confirm starting a backend export job by selecting Yes.
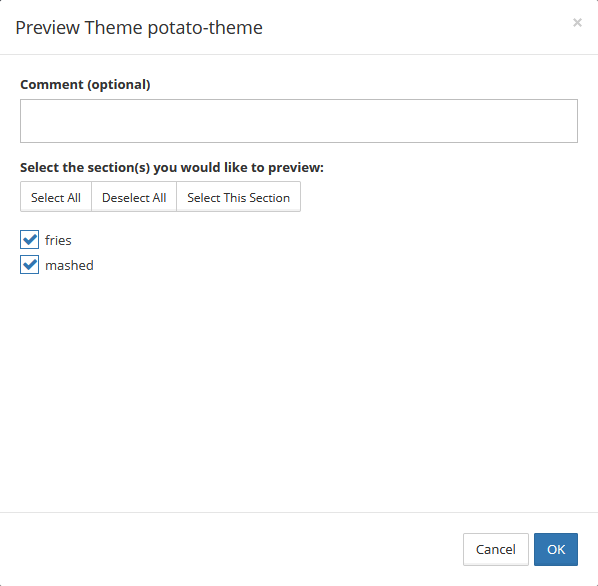
Add a comment, select theme sections to preview, then select OK.
Select Close. The Previews page displays a list of preview jobs with your job at the top of the list.
When the job status changes to Success, the Install option displays.
Select Install. For information on viewing the preview, refer to Use Preview Manager.
Create Micro App Preview
To create a micro app preview:
On the Micro Apps page, select the micro app to preview.
Select Preview.
Confirm starting a backend export job by selecting Yes.

Enter a comment if necessary, then select OK.
Select Close. The Previews page displays a list of preview jobs with your latest job at the top of the list.
When the job status changes to Success, the Install option displays.
Select Install. For information on viewing the preview, refer to Use Preview Manager.
Reuse Existing Preview
You can reuse previously created previews.
To reuse a theme or micro app preview:
In your working theme or micro app, select the Previews tab.
Locate the preview to reuse and select Install. For information on viewing the preview, refer to Use Preview Manager.
Content Loadables
Content loadables are software packages that can be distributed to an aircraft. In Config Tool 2.0, the content loadable package contains properties and values used by the onboard inflight entertainment applications.
For more information on content loadables, refer to Getting Started: Content Loadables.
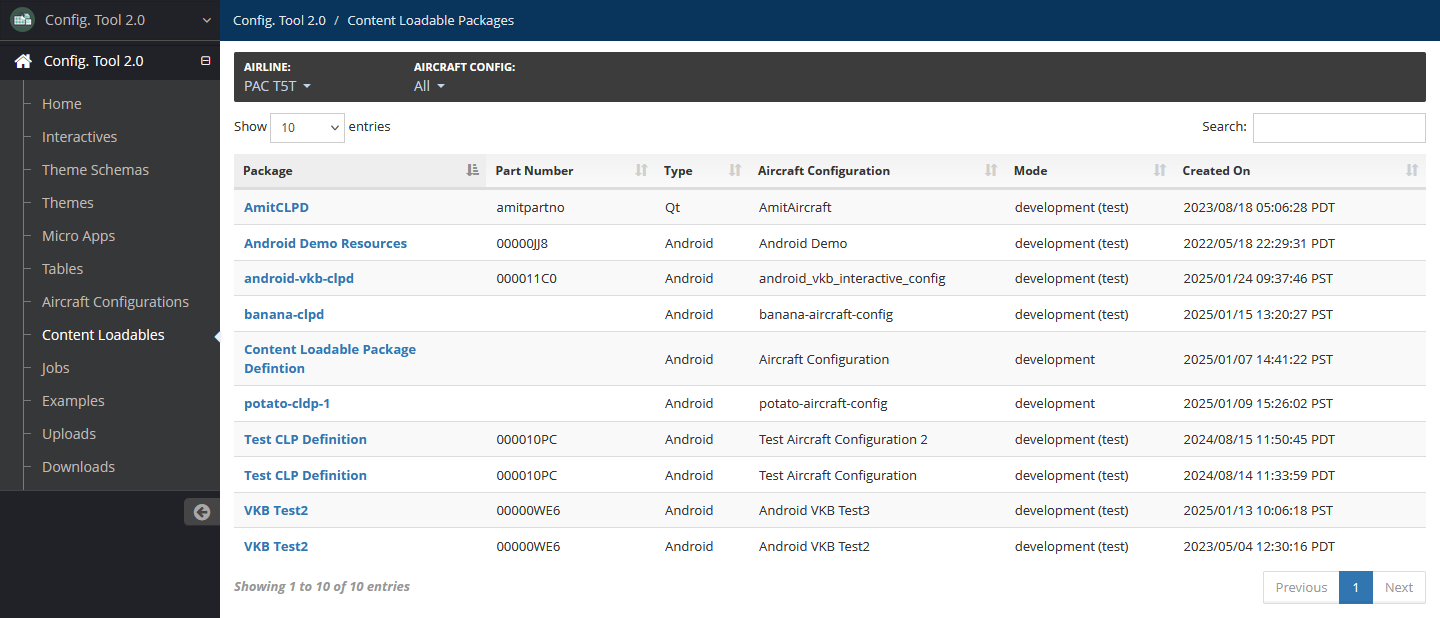
Access content loadables by selecting Content Loadables in the left navigation menu.
Create Content Loadable Package
To create a content loadable package:
On the Content Loadables page, select the content loadable package where you want to create a loadable.
Select Prepare Loadable, then select Create.
Developer users have a choice between creating a Test or Release loadable.
Select a version of each theme, micro app and table for each interactive listed. The latest version of each is selected by default, if available.
If a theme, micro app or table does not have a version available, you can create a version for each of them.
You can also create new versions of available themes, micro apps and tables for the content loadable package all at the same time by batch versioning. For more information, refer to Create Batch Version.
Qt loadables may have themes with the option to customize theme triggers. For more information, refer to Customize Theme Triggers.
You can add a comment for the content loadable package by selecting Edit Comment.
Start a background job to create the content loadable package by selecting Create Loadable, then selecting Create to confirm.
Select Jobs to check the job status and download the content loadable file once it finishes building.
Create Batch Version
A batch version contains themes, micro apps and tables used in a content loadable file package.
To create a batch version:
On the Content Loadables page, select the content loadable where you want to create a package.
Select Create Batch Versions.
Add the following details:
Version — Required
Unique version number using only alphanumeric characters, underscores and hyphens.
This version number will be set for all the themes, micro apps and tables that are selected to be versioned.
Comment — Optional
Description about the batch versions.
Themes — Optional
Select the themes for which you want to create versions.
Micro Apps — Optional
Select the micro apps for which you want to create versions.
Tables — Optional
Select the tables for which you want to create versions.
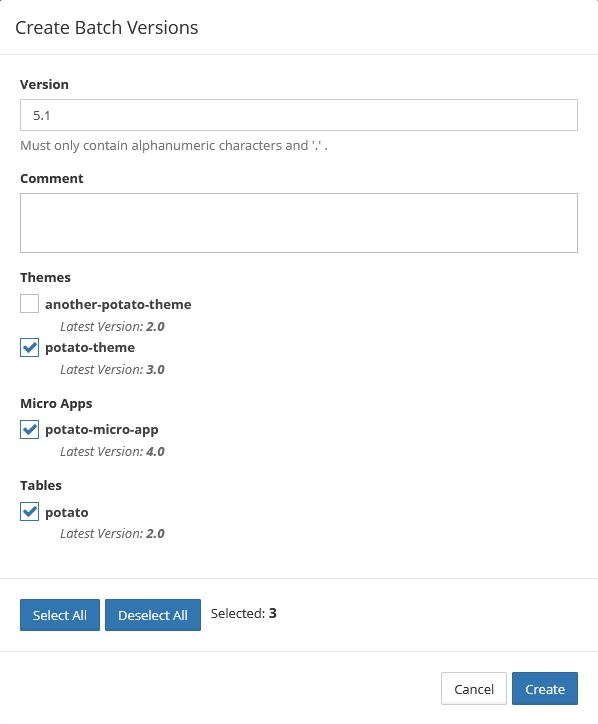
Select Create.
If there are any existing components that have a version with the version number you entered, the UI will highlight them. Enter a different version number that is unique for all components, then select Create again.
Once batch versions are finished, select Close.
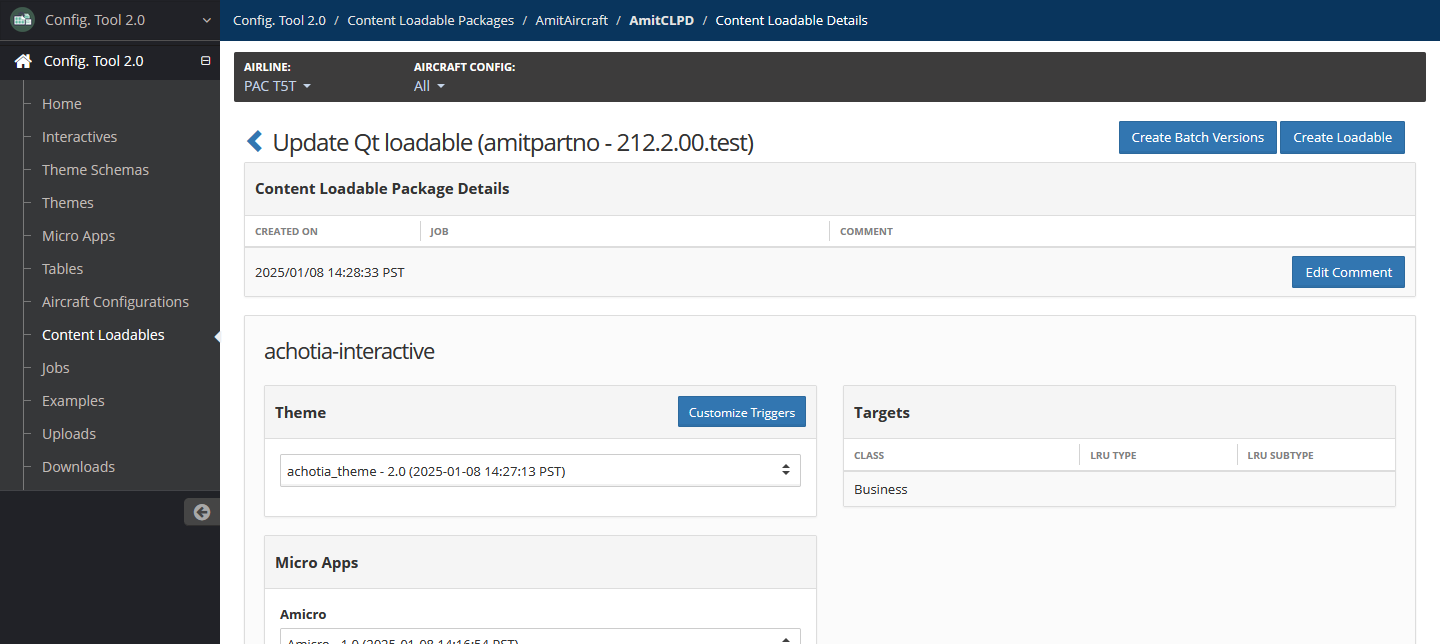
Customize Theme Triggers
When preparing content loadables, you may have the option to customize theme triggers for Qt loadables.
To add or update theme triggers:
Select Customize Triggers.
To add a trigger:
Select Add Trigger. A new Trigger panel displays.
Select Add, then select one of the following:
Route — Enter From and To destinations.
Date Range — Enter Start and End dates.
Customer-Defined — Enter a Key and Value.
Select a theme version to which the trigger should be applied.
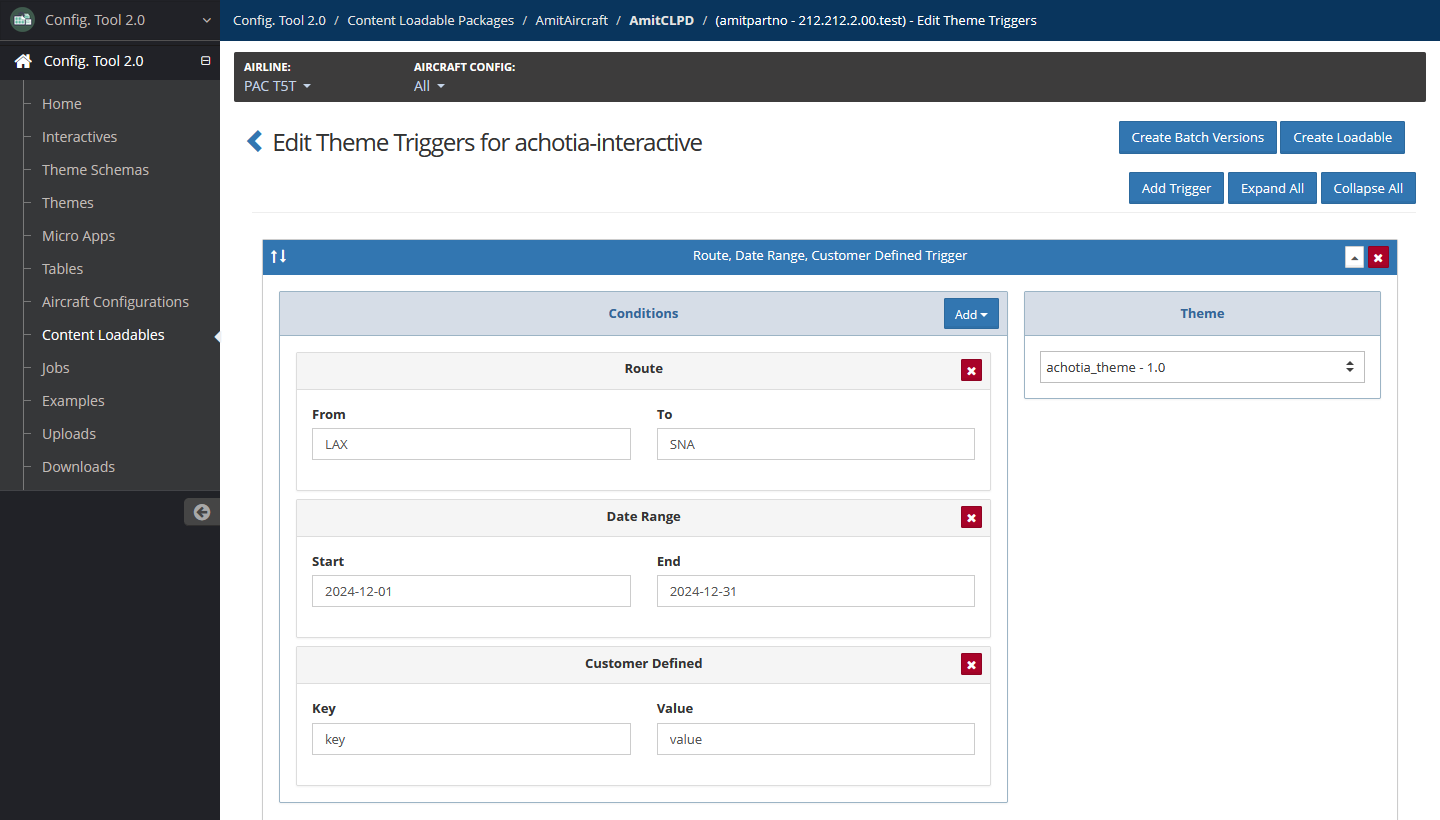
Edit or remove any existing triggers as needed.
You can reorder triggers by using the ↑↓ icon of a trigger to drag and drop the trigger to a new location.
Select Save.
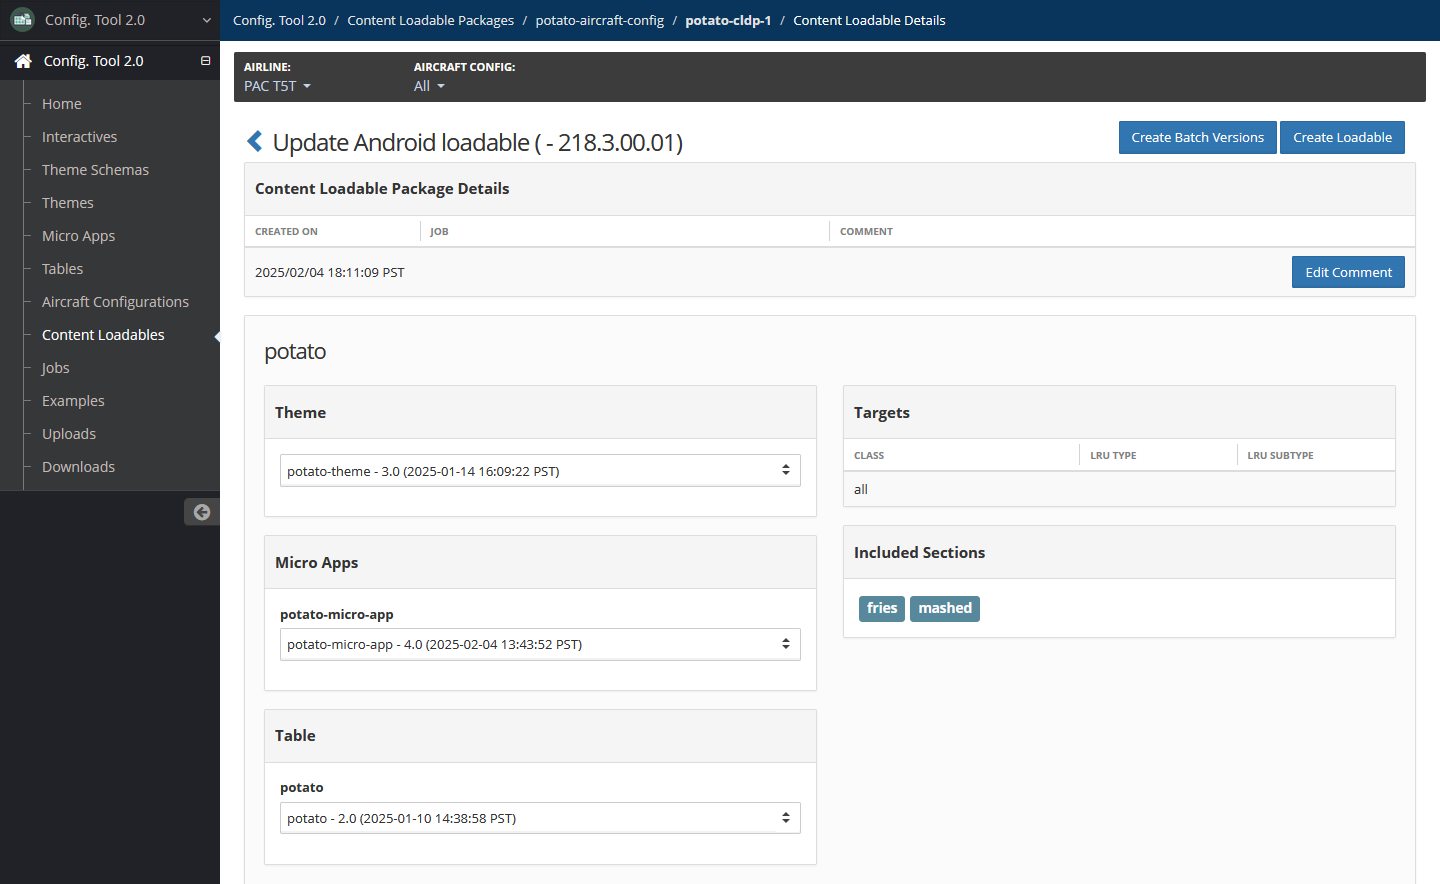
Update Content Loadable Package Details
To update content loadable package details:
In your working content loadable package, select the content loadable, or select Action then View Details.
Modify theme, micro app and table selections as needed. Selections automatically save.
Edit the comment by selecting Edit Comment, editing the comment, and selecting Update.
Delete Content Loadable Package
To delete a content loadable package:
In your working content loadable package, locate the content loadable.
Select Action, then select Delete.
Confirm the deletion by selecting Delete.
Jobs
Background jobs are run for different builds, such as creating content loadable packages and exporting themes.
The Jobs page displays a list of pending, in progress and completed jobs. Access this page by select Jobs in the left navigation menu.
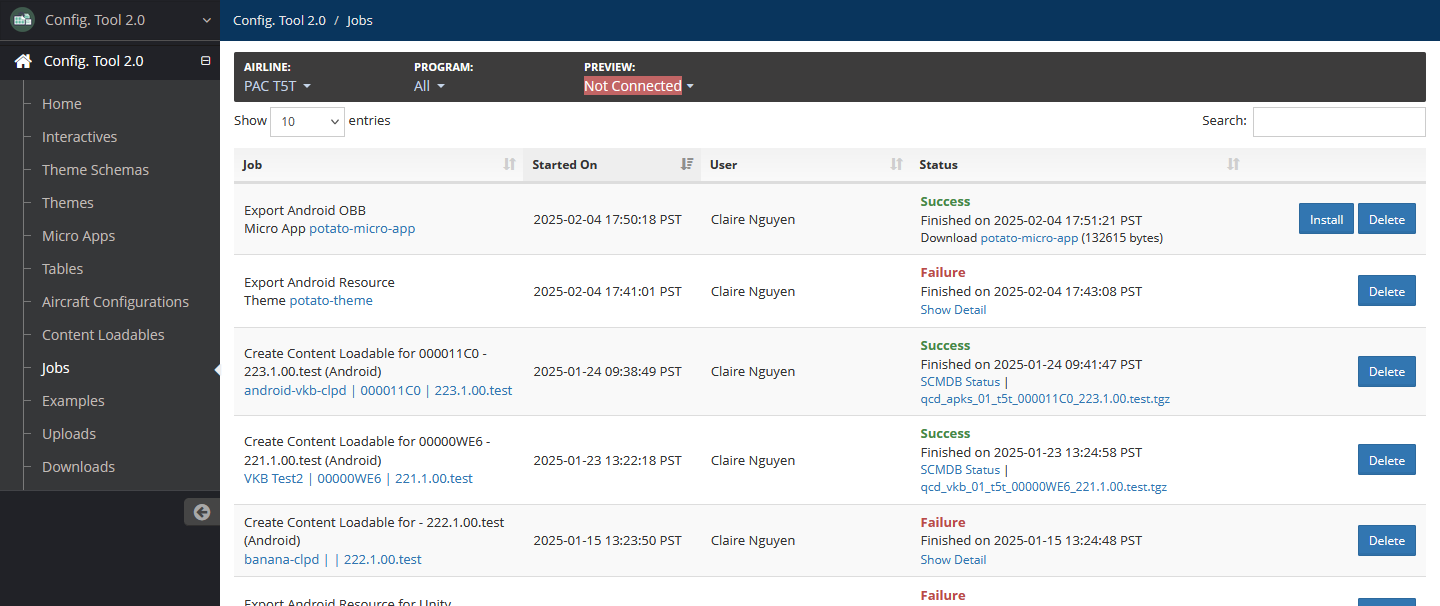
You can do the following with jobs:
Search for a job using the Search box.
Sort the list of jobs by selecting a column heading.
Select Delete to remove a job.
Select Install to view a preview.
Downloads
The download feature allows developer users to distribute files and updates among Config Tool 2.0 users.
Download a file by going to the Downloads page, then locating and selecting the file to download.
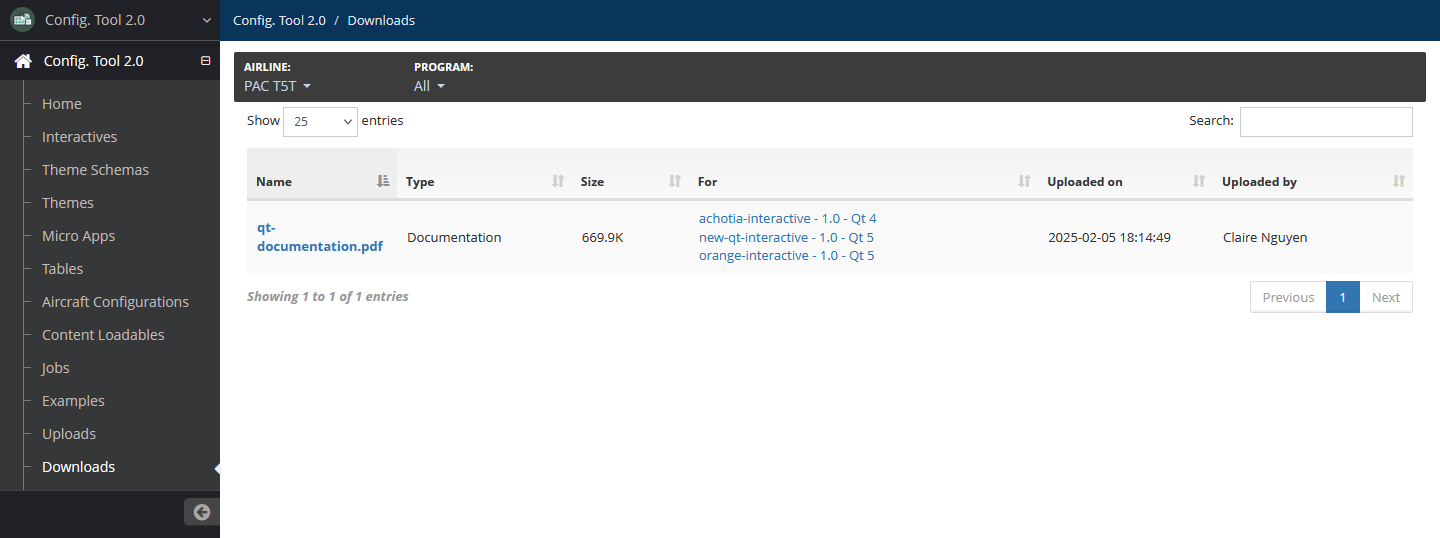
View a download's associated interactive by select the interactive. This displays the interactive details page.